Sunday, January 25, 2015

Halfway Day!


Today was an EXCITING day! My students had NO IDEA what they were in for... and you might not be either! Our day was JAM-PACKED with activities and snacks all about HALF and it started as a complete *surprise*....

O-H So Blessed Halfway Day


Here's how it all began, back to the very beginning... Picture it, Warren, Ohio - Summer 2014:

My dear friend Laura (who is also the teacher to our pen pals) and I were having our monthly lunch date and were talking about our approaching school year. The 100th day of school was brought up and I mentioned how I didn't want to celebrate it this year, but wanted to mix it up instead (maybe with the 101st day, or something like that). Shortly thereafter, Halfway Day was born! We envisioned it as a day to celebrate the 90th day of school, being halfway to summer (!) and working with fractions.

Well, the idea sat and sat in the back of our minds for quite some time, with teacher busy-ness and whatnot. So in November, at another of our monthly lunch dates we brainstormed a list of ideas. Again, they sat dormant in the back of my mind until one day over Christmas break I looked at my calendar and realized that Halfway Day was just three weeks away! Panic set in and I got right to work on the computer!

Thankfully, my creative juices were flowing and several great ideas came to life on my screen! Once I got the pack done (for the most part) on my end, I emailed it to Laura, and she worked on her part. We met the next afternoon for several hours at Starbucks and PRESTO! we had this pack!
I couldn't WAIT to implement it! Especially because we planned it to be a COMPLETE *surprise* to our students! They had to figure out that it was Halfway Day based on a clue on the board. We didn't countdown to it or anything, like you might typically do for the 100th day.

Here's how the day began...

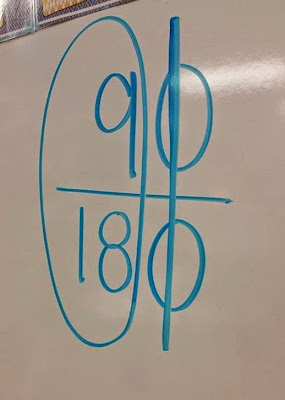
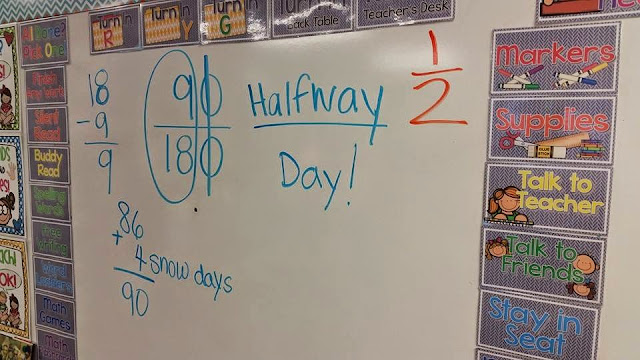
I put the fraction 90/180 on the board and told my students today was a special day... BUT, they had to figure it out!

             Halfway Day    

I had only ONE student get it - within just a few minutes! Several others came close, and I gave them a hint, as you see above, but eventually had to tell them. At first, they seemed a bit confused as to why we would celebrate this day. But when I told them there were snacks and lots of fun activities to do throughout the day... they were all in! ha!

Halfway Day

Halfway Day


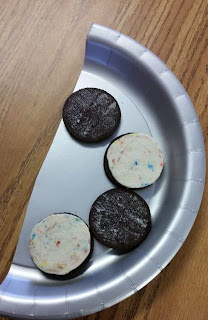
Once we took our spelling test (which I made with a fun party graphic - included in the pack!) we jumped into our celebration! Right before our morning snack and recess time, I gave them their first snack.... Oreos! I found these birthday cake flavored ones when shopping at Target and they looked like so much fun! Everyone got two and had to twist them in HALF before eating them! And, of course, we had to eat all of our snacks on a HALF of a plate!

Halfway Day


While they were gone, I decorated the room with this Happy Halfway Day! banner (included in the pack in full color and B&W) and put HALF shapes and whirly-gigs all around the room!

Halfway Day

                             Halfway Day
Halfway Day
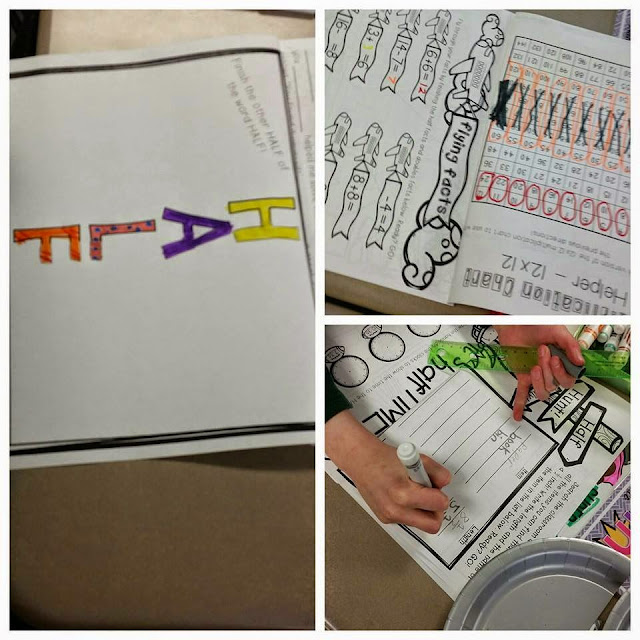
After snack, we jumped into our packet of activities! I took what you get in the Halfway Day pack and copied what I wanted to use with my class back-to-back, and then I stapled them to make mini booklets. It figured this would be the easiest way for us to work throughout the day, and copying them double-sided would save on some paper.

So we kicked it off with making equivalent fractions. Laura actually developed this part. The lesson is included in the pack. It show students equivalent fractions using a multiplication chart! Very cool! My class loved it, too, because we are just starting to learn multiplication, so anything connected to it just engages them like crazy!

Halfway Day
Next, students worked on their HALF facts and doubles facts in addition & subtraction, finished the other HALF of the word HALF, and took a HALF hunt around the classroom! They used their rulers to find and measure items, but could only record what measured to HALF inches.
'
Halfway Day

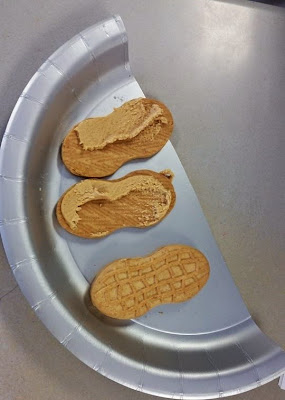
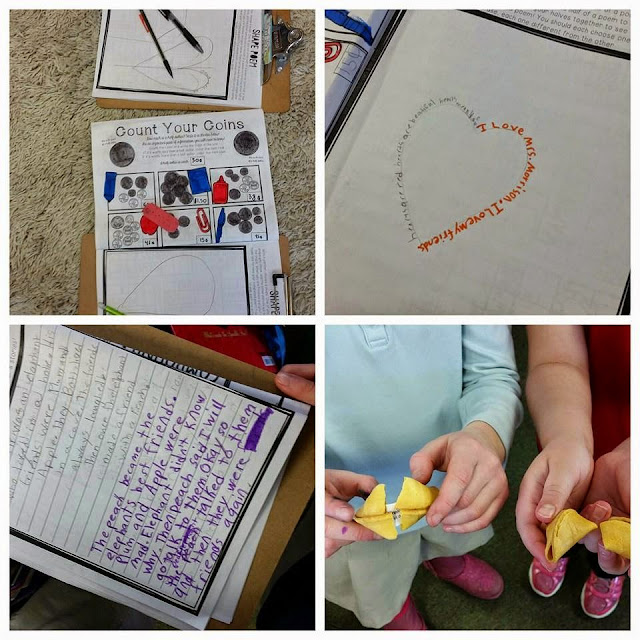
We ate some more snacks as we worked, including HALVES of pretzel rods, Nutter Butters twisted in HALF, and fortune cookies broken in HALF! We had some pretty ridiculous fortunes too, which made us all laugh!

Halfway DayHalfway Day
Halfway Day

We told time to the HALF hour, counted coins to find out if the total was worth more or less than a HALF dollar, and then spent time working with partners. We each wrote HALF of a shape poem an HALF of a story, and our partners finished the other HALF. Then, we shared them with the class.

Halfway Day


Halfway Day
We read a story all about fractions called My Half Day (by Doris Fisher) you can find on Amazon..

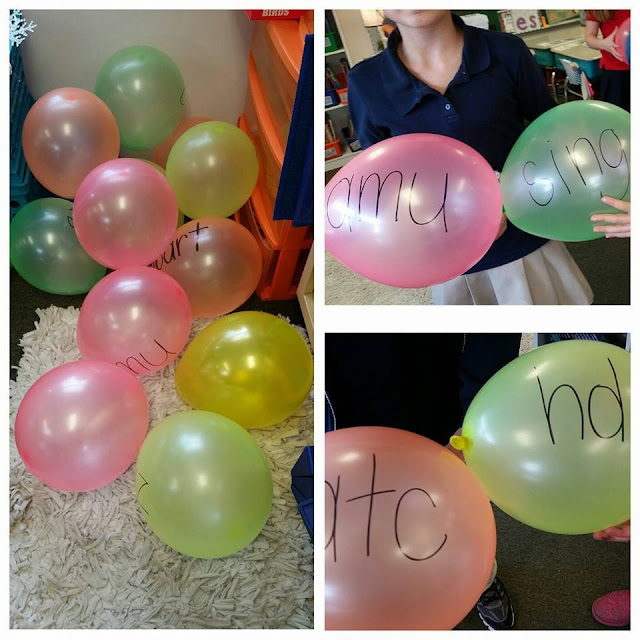
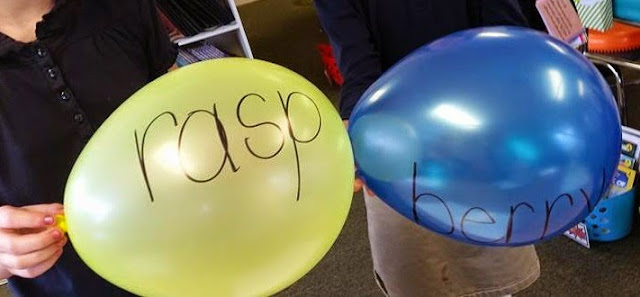
Our last activity of the day used the balloons I decorated the room with. I took our spelling words for next week and cut them in HALF. I wrote HALF on one balloon and HALF on the other. I put them throughout the room and each student had to get a balloon. Then, they had to find the person with the other HALF of their balloon and come to me to see if they were correct. By far the most fun part of the day! We will definitely be doing this game again! :)
Halfway Day

Halfway Day

Halfway Day

We ran out of time to finish our packet, but it also includes practice for breaking words in HALF as compound words, prefixes & suffixes, and by syllables! We also had a story to finish called "The HALVES and the HALF Nots," using HALF, HALVES, HAVE, and HAVEN'T correctly in the story where they were missing, but we just had TOO much fun and didn't get to finish! But now I know for next year to spend even more time on all the fun!

Well, that was our day! It was absolutely FANTASTIC and I am so thrilled about the success.. I can't WAIT to do it all over again next year! Such a celebration!! Next week we will spend time writing to our pen pals who had the SAME celebration, telling them all about our day! I made a "Happy Halfway Day!" writing paper included in the pack too :)

You can check out the pack by clicking below, if you want to spend your 90th of day of school surprising your class with an amazing day of HALVES! The pictures below allow you to see everything you get to celebrate YOUR HALFWAY DAY!!

Halfway Day

Halfway Day


Happy Halving!


Saturday, January 24, 2015

Erin Condren Teacher Planner: lesson planning with post-it notes!

Hey there everyone!

So several months ago I shared with you a blog tutorial on how to print onto post-it notes to transform your lesson plans in an Erin Condren Teacher Planner. Well, I know that giving (and taking) directions, is easiest to SEE what is happening, so I thought I would create a VIDEO to show you! A tad crazy (at least for me) because taping myself and talking to a webcam is a bit unnerving, but it was so much fun! Check out the video by clicking on the picture below!
 and PLEASE let me know your thoughts!


Then, you can grab the template I use from my TpT store (just click on the cover photo below)... I went ahead and it turned it into a permanent {FREEBIE!}


I hope you give it a shot if you have (and love!) an EC Teacher Planner and let me know how it works for you! I hope you absolutely LOVE it as much as I do! I find that it actually makes planning a *little* less daunting, sooo...HAPPY PLANNING! :)


Saturday, January 17, 2015

Math!

Today's post is about, you guessed it! MATH!

We finished our geometry unit this past week, and it was a lot of fun! Though my favorite is multiplication (which is up next!) I have to say the change-up of lessons each day makes it fun too. Here's some things we did during our unit::

When we finished, I had an extra day that I needed to fill with an activity. Since I don't want to teach graphing at the end of the year all at once like my curriculum sets up, I decided to do two graphing activities with our INBs from Blair Turner at One Lesson at a Time. They are fantastic and I have several more posts about them to come! I like to teach graphing all year long, so I intermittently add in lessons about different types of graphing. We practiced making bar graphs and pictographs this time:


Since I am blessed to teach at a private, Christian school we are not required to teach the CCSS. Again, I know - I am blessed! So I get to teach content that isn't covered in the standards, but that also means a lot of the resources I purchase on TpT don't cover those concepts. So, I started making a growing bundle pack of INB activities. We were learning about ordered pairs, so I came up with this pick and plot activity. After making the pocket in their NBs and gluing in the grid, they pick a pair and plot it on the grid in the matching color with a marker. It was a great way to practice the skill and they had fun doing it too! 


Here's the growing pack I mentioned... right now, it comes with 3 activities: the ordered pairs pick and plot activity, a 3 types of angles sort, and a sort for types of lines. The beauty of this pack is that when you purchase it now at a lower price, you get more activities added to it over time and don't pay the growing price!


When we got to solids I was excited to finally break out this activity - building solid shapes with toothpicks and marshmallows! They LOVED it! It was a hands-on, engaging, YUMMY treat to practice building 3-D shapes and their attributes.


I LOVE teaching math and as I mentioned above, multiplication is up next - my absolute favorite of all! I have a whole new set-up for how I am going to be teaching it and will be sharing it with you in a series of posts in the coming weeks! Stay tuned and happy teaching!

Have a blessed weekend :)


Saturday, January 10, 2015

Happy 2015!

Hey friends!

I hope you all had a very MERRY CHRISTMAS with your family and friends and enjoyed your time off of school! I know I greatly enjoyed mine, but was also so happy to see my kiddos on Monday! It didn't last long though... we had THREE snow days Wednesday, Thursday, and Friday... so much didn't get accomplished! On top of that I will be attending our local ACSI Spelling Bee as a judge on Friday and then MLK Day is Monday! So I now have 2 four days back-to-back after a two day week following Christmas break! this. is. NUTS!

I wanted to take a second to show you the results of my winter bulletin board. I showed you in my last post what it looked like without our writing craftivity after I changed the titled and borders, but never posted the after picture!

Here's the "before" for a reminder...


and here is the "after" with our snow globe fiction writing and snow globe craft!


The snow globes were SO much fun and a *tad* easier than I expected!

Here's how we made them!

First, I had to find those clear, plastic plates! Not as easy as one may expect! I finally checked a party supply store and found a 40 pack for $9. There were some cheaper ones but they weren't as clear or "globe"-like. I figured I could make a 40 pack last for at least 3 classes, so I was okay with that price.
I traced one onto cardstock to make a pattern and then kept drawing & erasing until I had something that resembled a snow globe and used that for a pattern. I then traced it onto several different colors of blue cardstock I had and cut them out. I wanted to do that for my students so the edges were nice and clean, but you could have them trace and cut a pattern on their own.

The students then made a background.with their markers and made a pattern on the bottom of the globe with pencil. We then mixed up some white glue and shaving cream to make "snow" and they added it where they wanted on to their globes. We let them dry over night and they loved seeing how puffy the "snow" stayed the next day!

I had them dress up in their winter gear (as much or as little as they wanted) and took their picture in the hall. I showed them the example I was using on Pinterest and let them '"pose" however they wanted. I cut out the pictures after I printed them, and *luckily* they were the exact right size!

We used glue and glitter to decorate the patterns on the bottom (I LOVE glitter!) and when all was ready and dry, I used a hot glue gun to affix the plates to the paper. 

It was several steps but still basically pretty easy, and SO much fun! They loved using their imagination and seeing everyone's completed snow globes! 


I hope you have a BLESSED beginning to your 2015!


Thursday, December 4, 2014

Easy Classroom Funds & a FREEBIE!

Hey all, I'm back! Two days in a row... CRAZY! :)

I have two SUPER FUN things for you today!

The first thing I want to share is a FREEBIE!! I recently hit a milestone on Facebook and promised that when I did I would post a freebie.... so I thought I would share it here too! However, it is NOT available in my TpT store, you it is exclusive to my followers to here to say THANK YOU! Click the picture below to download it from Google Dropbox!


Next, I have a tip for you on how to earn some extra funds for your classroom FOR FREE! and it's super EASY too!

It's a website called Swagbucks, where you can spend between 5-15 minutes a day (or longer, depending on your commitment and available free time) completing some simple activities that earn you Swagbucks that can be redeemed for FREE GIFT CARDS! WHAT!?

I know what you're thinking... too good to be true, right? I know I think that often... but I promise you, this is NOT! I randomly discovered this page one day, and have already earned over $100 in gifts cards to Amazon and PayPal! PayPal... LITERALLY FREE MONEY! It is awesome. You can then use the gift cards for whatever you want... but usually us teachers spend all of our extra money on our classrooms and kiddos, right?

So.. here's how you can get started and some examples of different ways you can easily earn Swagbucks and start getting free gift cards.

First.. you'll need to sign up for the account with your email address and create a username. You can click here to get started. Once you start your account, there are several simple ways to earn.

The first is to download and install the Swagbucks toolbar. It will then automatically earn you one free Swagbuck every day you open your browser!

You can also use Swagbucks instead of Google, Bing, Yahoo, or whatever search engine you use to earn Swagbucks towards those free gift cards. For example:

 Your homepage will look like this once you create your account. Simply type into the search box like I did, and your search results will come up. You might earn, you might not but the more you search the more likely you are to earn! Today, I searched for The School Supply Addict's blog so I could find a tutorial video of hers and I got 14 SBs just for searching through them! 
Next, you can complete some daily tasks. I'll show you these below, color coded by arrows.

The GREEN ARROW is your daily to-do list. Once you have the toolbar/button installed for your browser, it will automatically complete that for you and give you +1 SB. You can also answer a simple daily multiple choice question and BOOM +1 more SB. You can do the NOSO (NO Obligation Special Offers) for +2 SBs everyday. I simply click 'next' through each one, then enter the security display at the end. No more than a minute on that task. Then, the last one can be timely, but it's worth several SBs each day! It's Daily Crave. You click on it and "watch" a series of videos. Each time you click to "Crave On!" you earn SBs. I've earned 6-10 each time WITHOUT ACTUALLY WATCHING THE VIDEOS! Hence the watch in "quotation marks." I simply keep the window open, do some multitasking on other websites or documents or play on my phone until I'm done clicking through. I don't always do these though.. I usually just don't have the time or I forget. No biggie though. The screenshot of this was a day that I did do them, plus a few other things. I already was up to 19 for the day.

The PINK arrow shows you the number of SBs you collected that day. The more active you are, the higher the goal they set for you. If you don't reach that goal, no big deal. If you do, you get BONUS SBs that are awarded around the 5th of the next month. You can rack up those bonuses daily too. If you reach your first goal, they set a second one that is higher, but comes with a higher bonus too. For example, my goal on the above day was 40. If I reached 40 I would get 4 bonus bucks next month on the 5th in my account. My next goal is usaully 100 for the day and I would get a bonus of 10. But like I said, it varies based on your activity. My goal is usually 30 but because I was credited for Shop ^ Earn a day or so before that, I had a higher goal. I'll explain Shop & Earn below in a bit..

The BLUE arrow shows where you can redeem your rewards. More on that in a bit.
The PURPLE arrow is where you can see your earning history and current SB amount. I'm already ready for another free gift card! YAY! I'll redeem that now and show you your reward choices.. you'll love those :)

You can earn one more simple way .. with your phone. Of course, like everything else. There's an app for Swagbucks. Download it onto your phone from whatever store you need for a Droid or iPhone. Then, log in with your Swagbucks username like you do on your computer.
From the app, you'll be notified for the next way to earn... Swag Codes. They are simple phrases that Swagbucks releases on their various social media platforms. You had a set time to enter the phrase by and if you do, you get some SBs, anywhere from 3 to sometimes 7 or 8. Here's an example of one I just completed.


The picture on the left shows the Swag Code they posted on Instagram. I knew to go to IG because the app pop up told me to! I saw the code and the time I needed to enter it by (the app notifies you instantly though) and went to the app to type it in. This code is "SweaterSeason." You have to enter it EXACTLY as shown. Capitals and no spaces. I put it into the app as you see in the picture on the right and instantly earned 3 more SBs. There have been some special days where they release multiple codes in a day for a chance to earn 30+ SBs. Super simple. It takes literally one minute. They can post the codes in these places: Facebook, Instagram, Twitter, or their blog. (I just click to get to the blog from the homepage, which is the green icon right below your daily to-do list).

You can also earn by taking surveys. I don't usually meet the requirements for them, so I rarely attempt them. Your homepage also has several opportunities, some are quick and free, others are for signing up for something and may cost money. Once, I was able to sign up for Julep, got a free box from them (they are a nail polish subscription company) and got 500 SBs just for doing it! That's a free $5 giftcard!

Lastly, you can use Swagbucks when you are shopping to earn a TON of SBs in one shot! To do it, simply click on "Shop" at the top of your home page. It should be on the far right in the blue toolbar. From there, find the store you want to shop at online. It will show you if that store is eligible and how many SBs per dollar you earn by shopping there. Click the link to the store and it will take you directly to their website. I ALWAYS go through my home page so that I KNOW it opens the shopping ticket for me. From there, make your purchases as usual. I've earned from Microsoft when I bought the latest version of Office for my new laptop, from Hotels.com when my husband and I were traveling, and even on Amazon.

Here's how you can track your Shopping Earnings. On the homepage, go to your name and hover over it. It will drop down several selections, like this.
Click on Shop & Earn. From there it will show you the shopping tickets you have opened (it takes at least a day or so to post them). Then you can choose to see the purchases you have completed. (Again, it takes a day or two to show them). There it will show you how many SBs you earned and when you will receive them. The only downfall is they take 1 month to credit. But I usually find that they are worth it!

Here's what those pages look like:

Above are my shopping tickets. I didn't always make a purchase until I was ready (like you see for Microsoft Store)


There are my earnings through shopping. Some websites are worth more than others. You can see I most recently purchased from Amazon, but they only award certain departments and my books didn't qualify. Those departments change too, so it can be tricky to earn through them but I still always try! They recently updated this section and made it much easier to see your earnings and expected postings! SO NICE! 
Another thing about the Shop & Earns is this - you know that goal and bonus I mentioned above?? Well, your Shop & Earn SBs count for that goal the day you get them! Basically, you get some 8-10 ore SBs just because!


And now, finally, in the words of the amazing Kenny Chesney.... THE GOOD STUFF! 
FREE GIFT CARDS!

Once you have 450 SBs, you are good to go on getting a gift card reward. I think with less of them you can spend them to enter sweepstakes to try to win stuff, but I never do. It seems pointless - I never win anything. If you seem to be lucky though, give it a try! 
Anyhow, the more you save up , the bigger the reward you can redeem. It's up to you and your patience level. I am not patient. ha!

So, since I have enough to redeem I'll show you the simple steps. Once you go to the Rewards Store from your home page (the blue arrow above shows you where) you can see what is available. Here's what it looks like:


You can see I can earn a $5 Amazon.com gift card already with my 608 SBs at the moment. Those are what I usually buy.  However, I know they have Target and Starbucks, plus PayPal as I mentioned before. You just need to save some more for PayPal. They also have differing amounts which cost more too. Look around and see what they have. Amazon works for me, but I'm sure there are tons of others!

So, once you decide which one you want, click on it. 
When this screen pops up, click the green button that says SNAG THIS!

It will then ask you to Submit your order. Once you do, you will need to verify that YOU purchased it with your email or the security question you answered when you set up your account. I usually go this route if I am doing it from my computer so I can instantly verify it.


Above, I answered the security question and it shows me right away that I am verified. It also shows my updated SB balance after the purchase. I still have 158 left. In about a week or so, they will email me that I have received the gift card in my Swagbucks account (which you access in the same way as your Shop & Earn) and I can copy the code into my Amazon account for $5 toward any purchase! THAT'S IT!

Here's a look at that page once you get the gift card. You can see I got one not long ago in November and one in October. I like to put them into my account and leave them there for Kindle purchases. That way I always have Amazon money waiting for me... FOR FREE! 
SO COOL!


I just counted my total gift card earnings since I started in August of 2013 and so far I have gotten $125 worth just for using their website and doing the things listed above! That's just over a year I've earned that! What I have done isn't nearly what you could do. Some people do it for an hour or so a day doing several other more advanced things. Some people do it to the point the make themselves one gift card per day. They do team challenges you can join, have SwagbucksTV, tons of surveys, and a bunch of other things I just don't have the time for, but I know they also make a lot more SBs for gift cards doing so. Maybe in the summer I'll find time...... yeah, right! If I did, I would totally get the PayPal gift cards for free money to transfer into my bank account! I have done that before and let me tell you, it was great. It just takes patience to save up to 2,500 SBs..... of which I have very little to none.


WHEW! That was quite a long post and tutorial but I hope you found it helpful and that you decide to try it out and join me in earning FREE GIFT CARDS! It's super simple and you can put in as much time as you want. You can use the gift cards for anything you like, including your classroom. What teacher wouldn't love that!? Then, you can refer your friends and earn even more SBs that way! I've never really referred anyone to earn that way, but I know it can make you a lot more!

If you have any questions about it, feel free to ask! Comment below or email me at mrstamilynnmo@aol.com. I'd be happy to help you out because I think us teachers need all the tools we can get to supply our classrooms without breaking the bank!

Have a blessed evening and Happy Swagbucking!

Wednesday, December 3, 2014

SnOw Excited!


Hey there friends!
I am SNOW excited for SNOW many reasons!

First of all, we had our FIRST SNOW DAY already this year! It actually happened a couple of weeks ago in the middle of November...WHAAAT!?? I know, right?! It was crazy. I hope it's not a foreshadowing of our NE Ohio winter ahead! I told my Grandpa about it, who lives in Florida now but grew up here. He said, if it stays at this rate, I could be teaching well into July! oi! I sure hope not!

I am also excited because I got the NEW Skippyjon Jones book titled Snow What!

It is just SO CUTE! I got it about a week ago and had to share it imediately the next day morning with my kiddos because I just couldn't wait to show it to them and put it out in the library! They just LOVE Skippy [as we affectionately call him :)] and look forward to every Friday afternoon when they get to find out who goes home with him for the weekend! It bought the Literacy Bag they sell on the official Skippyjon Jones website, plus a Skippyjon Jones stuffed animal from Kohl's Cares (who can beat $5!?)

I'm also excited to show you my new door decor and bulletin board for winter! I just LOVE them both!

Here's my door:
 

I used teal chevron wrapping paper I bought at Target as the background. I just love using wrapping paper! Do you?? I also used Poppy Red Chevron Border from Creative Teaching Press and broke up the pattern with a plain black border to make the edges really pop. I then used those amazing KG fonts from Kimberly Geswein to make the lettering. I printed the J in white with a black outline in Blank Space Solid and make the Jesus in KG Blank Space Sketch in red. I printed them onto cardstock, cut the out and laminated them. I covered the J in silver glitter to make it stand out. (I love glitter!) The is for is the font KG Always a Good Time. I also made the Legend of the Candy Cane poster with a poem I found online. I used some candy cane clip art from Krista over at Creative Clips to add some extra flair to match the poster I made. My colleague in 4th grade saw the garland at Dollar Tree so I added that on there. Finally, after reading the book The Legend of the Candy Cane to my students, we made our own candy canes and 'Js for Jesus.' They were super simple and yes, I broke out the glitter for them! I know a lot of teachers don't like glitter.. but I just love it! :)

Finally, here is our new bulletin board for winter. It isn't quite done because we have to still do the craftivity and writing, but it's at least up and looks good for now!

I really love this board because I was able to utilize the wrapping paper and red polka dots border I put up at the beginning of the school year. I only had to take down our original board and change the top layer of border to transform it for winter. I have a HUGE bulletin board that takes at least a roll and half of wrapping paper. Plus, I love that blue and white stripe pattern and Target is all out of it, so I wanted to make it last all year! I try to do that often over the course of the school year. I'll be blogging about that soon to share with and show you how I keep that background and borders up year round!
So here's how I made it... again, I used chevron border from Creative Teaching Press, this time in gray. (It had previously been yellow for our Superhero Kids theme). I then just added some foam snowflake cutouts I had randomly around the edges. I printed some snow globe clip art from Krista again at Creative Clips and used KG fonts for my title. The 'If I lived in a" if KG Blank Spaces Sketch again, and "snow globe" is KG Wake Me Up. Again, I printed on card stock and laminated them so I can reuse them! Next week we will work on this craftivity and writing piece since we had some other things to work on this week. I can't wait to show you what they write and come up with! I am still thinking through exactly what I want the craft to look like. Here's some examples I found on Pinterest...

Aren't they adorable?! I'm not sure which one, or combination of them I will come up with. But I'm excited :) I do know I will take their pictures to put in them. They are just too cute :) I pinned a bunch of ideas on my Pinterest board Teaching [crafts] if you want to check out all my pins and pin with me!


Well, that's all of my SNOW excitedness for the moment. What are you SNOW excited about??
Happy December, friends!