Hey friends!
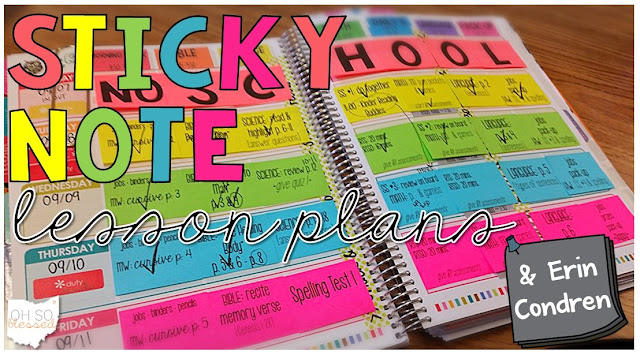
I am so excited about this post because that picture above just makes my {teacher} heart SO HAPPY! I absolutely love lesson planning and looking at my lesson planner because, well.. just LOOK AT THAT! Those colors, those fonts, and that organization. It's too much! GAHH!
SOOOO... anyhow.. enough of my gushing... I guess I should start telling you WHY it's there!
If you've been on my Facebook page, Instagram, or Pinterest at all, it might look a tad familiar.
There's a post & YouTube video floating around that I've already done telling all about how I create my Erin Condren Teacher Planner with sticky notes.
However, I have been able to take this gorgeous masterpiece of a plan book... and improve upon it EVEN MORE! say whaaat!? I know! I didn't think this was at all possible either.. but it is!
So... if you first need to read the original post about how I did that... do that RIGHT HERE. RIGHT NOW.
Then come on back and read what's NEW AND IMPROVED!
So...let's play a game and see if you can SPOT THE DIFFERENCE:
Did you find it?
Here's what's new.... MY SUBJECT LABELS! noooww take a look!:
It may seem silly... but can I just say how WONDERFUL it is to not have to hand write almost anything in my planner these days!?!
Thanks to the genius of my friend Lisa over at Fourth and Ten and her beautiful Instagram post, I no longer have to write in my subject headers and times! Using Avery Return Address Labels [and all of the patience I can muster!] I created these subject and time labels for my planner! Now, I spend even LESS TIME setting up my planner week to week. I simply put in the labels, washi tape for our snack & lunch breaks, and I'm good to go.
Here's what a bunch of them printed out looks like:
I think I am even going to try doing my dates on them too so literally nothing is written in anymore. Another plus? If I mess up or decide to change something I can just cover it up with another and be none the wiser!
So, I know you might be asking "how do you make the labels in color?" Well, this is where that patience I mentioned [and don't have much of!] comes in. When you download and open the template [which you can get here for free from Avery] in Microsoft Word. I select the box in the template and go to "Format" >> "Shape Fill." Then, select the color you want the background to be. Of course, you can leave it white. But I went ahead and gave mine a rainbow pattern. Then, I overlay a text box [which I make translucent] and format my text. I copy and paste the text boxes to fill one column with the same label format. So, the first column is my red "Morning Work" label, the second is the orange "Bible" label, the third alternates "Science," "Health," & "History" in yellow since that's how I will be teaching it this year [rotating through each content over the course of the whole year] and then the last column on the page is the green "Math" label. Then, once I save the file, I close it and copy the entire file itself and paste it onto my desktop. I rename it (something I'll remember that corresponds) and change the text boxes to the times for each of those same subjects. That way the colors are already done and I just have to change the text and formatting.
I say it takes patience because Microsoft Word is finicky when it comes to layering and I spent a lot of time adjusting the text boxes so they would line up well. But, now that it's done it looks great and was well worth the frustration!
>>> If you click here, you can download one of my label files and give them a try to see what I mean. You'll need the font CartonSix so it looks right and go from there so some of the formatting is done for you! Remember..it's in WORD. I'm sorry!
PRINTING TIP >>> once you create those labels, you will need to save them as a PDF in order to print. The first time I went to print I didn't do that.. and they didn't bring with the color fill. So I have some pages of just plain white labels. Anybody want them!?
I bought the Avery Return Address Labels on Amazon... you can get a box of 2000 here and have them for at least 2 years, if not more.. it just depends how many you use a week. Right now, I use 19 a week, but if I print the dates like I think I will that will be 24 a week x at least 34 weeks of planning for 816 labels a year. 2000 divided by 816 is 2.45 years... not bad for about $7!
For your enjoyment, here's another look at the goodness of all the supplies I use when I am putting it all together...
You can see in the top right that I used labels to insert when I do our daily Read Aloud under other plans because I didn't have room elsewhere. It works great! I love that the post-it allows for TWICE the planning room. You can lift them up and jot notes, ideas, and changes underneath for future reference [and hide them with the post-it!]


Thanks for the tips and the templates. I can't wait to try this for the upcoming school year!
ReplyDelete