Showing posts with label décor. Show all posts

Monday, August 3, 2015

BTS 2015 Prep: Bulletin Boards!

*this post includes Amazon affiliate links


Hey friends!! I am so excited to link up today (a day behind..oops!) with Ashley & Angie for the #2getherwearebetter linky!


Every month they host a link up that [in the words of Ashley herself] "brings teachers together to share among, collaborate with, and inspire one another!" How amazing is that?!?

So, I am here to talk to you more about my bulletin boards, specifically to show off  show you my latest creation as I was able to get into my classroom last week and begin my BTS prep for the new year!

This was the only board I was truly able to finish at the moment, but I hope it gives you some inspiration for colors, designs, and fonts to use in your classroom!


My FAVORITE color is orange! So, I was able to find a roll of fadeless orange bulletin board paper at school (score!) and hung that as my background. Then, I layered my borders. It's is one of my favorite things to do with border! I love how the white makes the border POP!, gives a straight edge finish, and highlights the scalloped edge of the border! You can see that I am pairing orange and turquoise in my room with year, so those colors will be represented throughout my classroom and other bulletin boards to come! 

Here's a close-up of the borders and font:
I'm in love! *swoon*

I used the font MTF Jumpin' Jack EXT for the banner title.. it's my new favorite and will be allll over my room this year!

I also like using thumbtacks to hang borders... it does just a little less damage to your borders than stapling, and sometimes (depending on the colors/patterns) you can hide them better than a staple!

I wish I had more to share with you right now, but I promise I'll be back with a TON more decor ideas and inspiration I get into my classroom later this week and next week! Our annual Back to School picnic is the 15th of this month, so I don't have tooo much time to get myself ready, even though we start back the 25th with the kiddos!


What do you think of this board? I hope it gives you some inspiration as you start back to school!

If you love it, you can purchase the banner title and rules here on TpT to save yourself some time! >>> CLICK HERE! <<<

You can click the picture below if you like the scalloped border and want to purchase it as well!


Monday, June 29, 2015

Monday Made It >>>> Marquee Letter!

My first ever Monday Made It link up project!!! (except that I made this last Thursday... ha!)


A few weeks ago I was wandering through Hobby Lobby and happened upon these marquee letter light kits. I thought about how great they would like in my classroom library to spell out "READ"... buuuttt I already have letters hanging that spell that out next to my bulletin board. So, that seemed wasteful. Still... I really wanted to do something with one or some of them....


It was only $12.99 for the kit.. which includes everything you need except the batteries. Oh yeah - IT TAKES BATTERIES! Only two AAAs.. which means you can put this baby anywhere you want! No restrictions to outlets or an ugly cord to hide! I pulled up a 40% off coupon on my phone, grabbed an 'M' for my last initial (Morrison) and I was sold.

It shows you on the back of the box that you can decorate it to look however you like because it comes with a template of the letter that you can decorate or use as a tracer and insert into your light. So, I grabbed a sheet of orange glitter cardstock (orange is my favorite color!) and headed to the checkout.

When I got home, I unpacked everything and got to tracing!

 Here's everything you get (minus the hole puncher....)

Here, I traced the 'M' onto the back of the glitter cardstock, cut it out and traced the circles...


But then, I encountered a DIY FAIL! My hole puncher would reach ANY of the holes. So, I had this beautiful 'M" but no way to get the lights to come through. I couldn't locate my xacto knife (I think it is sadly packed away at school.. sigh) So.. I put the project on hold until I got more supplies.

I finally made it to Target one day, and bought some Modge Podge and glitter. I decided instead to just use the template they gave me (that you can see above) and would glitterize it to put back in so I wouldn't have to worry about making those pesky holes.

Here are all of my supplies.. (the Modge Podge was only $1 in the Dollar Spot - just sayin'!)

I started with a small paint brush and just started covering the template in the glue. I didn't want it to dry too quickly, so after I covered the right half with glue I quickly glitterized it and then started to glue the other half.


After I glitterized the entire thing, some of it wasn't quite heavy enough on the glitter compared to other parts, so I touched them up with more glue and glitter... 

...and then finally decided to cover the spots and let the whole thing set and dry for a while.


It still wasn't as perfect as the glitter cardstock would have been.. but oh well, it's good enough!

Once it was dry, I put it all back together.. here are some pictures for you to check out of the finished product!


 from the back, installed and turned on..


A small shot of how it looks if you choose to leave it white... still looks good to me!

I know there are some teachers & DIYers out there who despise glitter.... I'm so sorry for you. I just LOVE glitter. I don't care if it makes a mess. I can vacuum and wipe it up a few times. The clean up does not out weigh the beauty of the sparkle. But, if you really feel that way and want to make one of these sans glitter, the box gives you lots of ideas. You can use duct tape, washi tape, spray paint, you could even color it if you wanted to! You can totally have fun with it and make it what you want!

My new glittery version is going to sit on my bookshelf in the classroom. I am going without a desk this upcoming year and saw a great bookshelf at Office Max that I can stand at with my laptop on the top, and keep my supplies down below. I am low on outlet space over there between my laptop charger, intercom, and CD player, so this battery operated beauty can sit anywhere I want and shine some orange sparkles on me :)

What did you make today!??


Monday, June 15, 2015

One Bulletin Board... all year long!

There is one common thing a lot of teachers seem to dread about their classroom.... BULLETIN BOARDS.

Now, I may be crazy... okay, okay, I AM CRAZY. But I don't mind bulletin boards one bit. I LOVE decorating them, finding fun colors and items to use, and thinking of a creative play on words for the title.

I think the one thing teachers get hung up on is hanging the paper and border every time. (you see what I did there!? #punnerd)  and for me, I only dislike it because I have a GIGANTIC bulletin board and an affinity for patterned wrapping paper. So recovering it every time takes about 2 rolls of paper and seems wasteful.


So this year, I decided to try putting up my paper and border ONCE and leaving it up all year, no matter what I changed it to for the season. I did this last year too, and it seemed to work well, so I thought I would document it for you and see what you think about it. It miiiight just make the task a tad less daunting for you... hopefully!


Here's some tips for how I did it...


Choosing a neutral background is the most important.. which is why I listed it first. Something neutral is going to be able to go with a variety of themes, colors, and seasons. I chose this navy blue striped wrapping paper from Target. It's simple with clean lines and has the potential to match a lot of things.

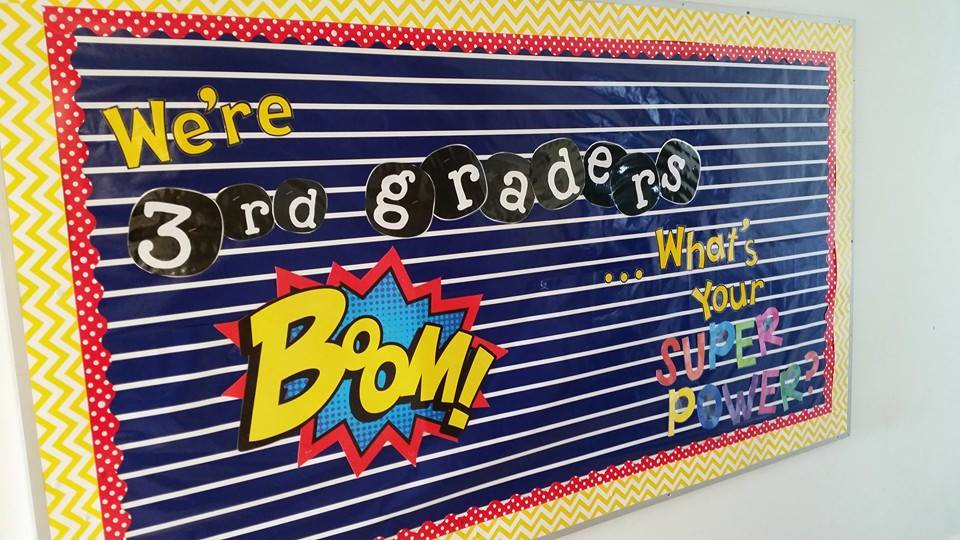
The year started with a super hero theme, so I matched it accordingly with my borders and other decor::
This went up in August and stayed until November-ish.


I use white thumb tacks to put up my borders. This makes it easier for me to change them down the road if I want to, because removing staples is a pain. It is also super easy to hide them in the border and then they aren't really even seen then! Like the polka dot border above... I just put a tack right on top of a dot and boom.. camouflaged.

Bonus: less holes in your border when you take it down compared to staples.
Double Bonus: you don't need to use a staple remover, so you're less likely to rip it!


..and then change ONE of them. I changed the bulletin board a tad late into the year... and when it started to snow I used this idea I found on Pinterest. I left up the red polka dot border that I had used before and just changed the yellow chevron to gray chevron.... same background but a much softer look for winter with the gray. I changed one piece at at time and it was so simple, compared to taking it allll down and putting something new up.

This stayed up November-ish until March. Winter is long in Ohio!
Click the picture to download the writing prompt paper for FREE!

To make the snowglobe, I traced the clear plastic plates I bought at a party store and drew on the bottom part for the globe freehand. I traced them on cardstock and the students cut them out.

I took their pictures all bundled up in their winter gear in the hallway. By taking them horizontally so that my students' entire bodies were in the picture and printing them as a 4x6" photo, they were able to JUST fit perfectly inside the plate!

I let my students decorate the inside to MATCH their story (so we did the writing process and activity first) and then we made the snow globe.

I mixed white glue and shaving cream for puffy paint for the snow and we broke out the glitter to decorate the bottoms of the snow globes (if they wanted... which they all did, of course!)

After they were completely dry (this took a few days) I hot glued the edge of the plate the cardstock snow globe. It's important to leave a small edge beyond what you trace so that there is room for the plate and paper to attach well. Beware: this uses a LOT of hot glue!

To hang them, I attached a small loop of yarn to the back of the globe with hot glue as well, but that is completely optional, depending on how you want to display them!  This has been one of my most favorite craftivities to date! I highly recommend it!


It's not always easy... so think about it. I had to kind of plan before I could make this bulletin board. I needed something to keep the blue. It reminded me of the sky so that idea led to finding something with clouds, and a Pinterest search led me to the balloon idea, which inspired the title. A little planning goes a long way, if you take a bit of time to do it. So don't rush the bulletin board change. It's okay if you don't change it immediately. Your board is still cute if you wait a week!

Here, you can see I just changed the inside border but left the gray. I went from red polka dots to hot pink on the inside. A few white thumb tacks stand out, but still look cute.
This bulletin board stayed up from late March and into May.


 Don't try to overdue it. I let the borders and background colors speak for the design the most and add just a few touches. A few fun fonts for the title and that's all I needed. The bright yellow pops against the blue and the cloud from the last board stayed up.. then I just added in my students' writing craftivity and that was that. I put this up in May and it stayed up until the end of the year.


and that was that. I made it last all year. I bought those two rolls of wrapping paper for about $6 at Target and made it last all year. I strategically covered any tears or worn out spots with the other items I put up and it didn't look bad through all 9 months... and I didn't have the headache of putting up new paper every time I did a new one.


What do you think? Would this solve your frustration with bulletin boards? Would you try it!?
Let me know in the comments below!


Wednesday, March 26, 2014

I {mustache} You a Question.....

.......do you love giveaways!??!

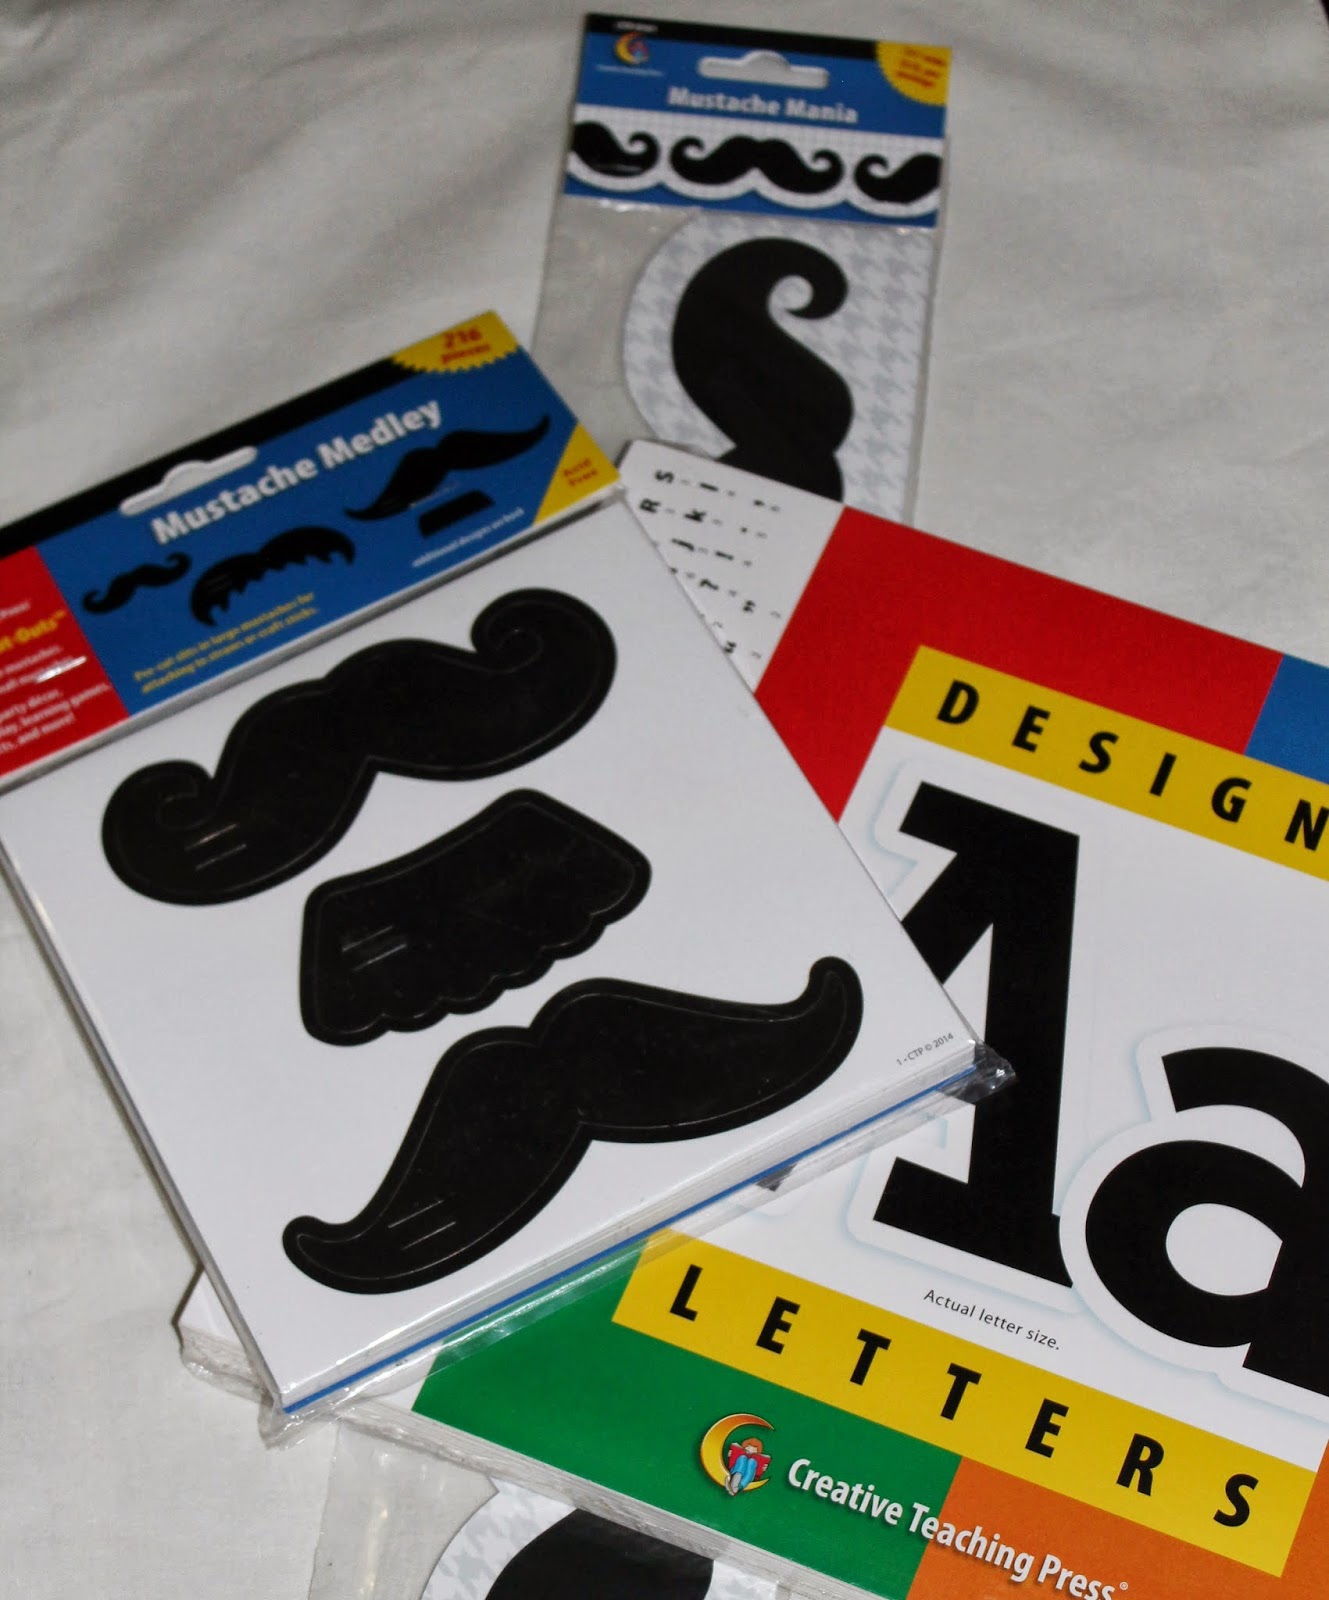
If so, you've found the right place!!! Thanks to Creative Teaching Press I am giving away some fan-STACHE-tic classroom goodies!

I recently made a new door for my classroom with the latest craze... MUSTACHES!


It's by far one of my most favorite doors/bulletin boards!

You can recreate it or make your own fan-stache-tic display by entering my giveaway below!
You can earn extra daily entries on my Instagram account too! :)
Here's what you'll win!


a Rafflecopter giveaway


Wednesday, January 29, 2014

Exciting News, Riveting Robots & MORE Chevron!

Hey there!

I am excited to announce that I will be pairing up with Creative Teaching Press to receive and review their products here on my blog! What's more exciting is.... I will be able to do GIVEAWAYS so you can have a chance at trying out their products too! YAY!

So, to kick it off, I am going to show you how I have been using some of their newer [and cuter] lines in my classroom this year!

The first is their Riveting Robots! Each year I have had a theme in my classroom. The first year I used stars everywhere and had a star calendar and star job chart. Last year I used owls. I love owls and have an overall general chevron theme going, but I wanted a new calendar, job chart, and additional theme since I have had the same students the past couple of years. I was shopping at Lakeshore one day [teacher heaven!] and saw these cute gears and robots borders. I did some digging on the CTP website and was hooked! I decided that the owls had been more of a girly theme [as most are, being that they are décor items] so I figured the boys would appreciate this theme a bit more :)

Here's a look at how I used them:

I decided to make my hallway bulletin more permanent this year to display student work, and change the covering on my door periodically instead [see below for my doors so far this year!] On the right is the permanent work display with their Dots on Turquoise Border, and on the left I used the Nuts & Bolts poster from the Riveting Robots Bulletin Board Set.  I love mixing patterns, so the Target wrapping papers and polka dot borders were fun to mix and match!

 
Here's how I use the poster more specifically: since it says "The Nuts & Bolts of" and leaves it open-ended for a variety of uses, I decided to use it to display our "objectives" or broad learning concepts in each subject. Bible is changed weekly to include our unit focus and memory verse, but the others change less frequently. I laminated it and use a dry erase marker so I can change, add, and or remove things as often as I need. I like displaying it in the hallways for parents and visitors to see what we're working on! I also used the gear to show what we will be working on in the near future!


To make attendance a bit more visual [and to cover my not so attractive desk!] I used the Riveting Robots Designer Cut-outs with some chevron contact paper I found on Amazon. I wrote my students' names and laminated them for durability all year, and added magnets to the back. My little "robots" report each day to show if they are absent or present. It's just a fun, silly way I brought in the robots some more :)


I [of course] had to buy a new calendar set & job chart to match my other new robot themed items! Since I have a lack of wall space and A LOT of windows, I decided to make my window my calendar space. Since we are in 3rd grade now, I don't feel the need to have a calendar time/morning meeting everyday. Instead, the calendar is one of my classroom jobs. We use window markers from Pat Catan's in bright colors to write the regular date and digital date below the calendar itself :)  The days of the week and weather report are below the window on the wall.


Of course the job chart needed a fun title to it [in 1st grade they were "Star Helpers" and last year they were "Owl-fully Helpful!"] This year, they are my "Handy Helpers!" :)
 
Lastly, I used the corresponding gears border [my favorite of the whole line!] and robot cut-outs to make my door covering to kick off the new year.... we were "Gearing Up for Third Grade!"
 
 
My only regret was not ordering the matching letters they have for this line. When I was shopping at Lakeshore they had some items for the line, but not all of them. So I had to go online to buy the other pieces I needed/wanted. I had already bought the above set of letters, so I made them work. But I am thinking I am going to have to get the matching nuts and bolts style lettering for future use.
 
What do you think of the Riveting Robots line?!? Leave some comments below and let me know! I personally love, as did the boys in my class!! What is great about it, too, is there are many colors and patterns mixed into everything so it can easily go along with many of the items you already have. If you have primary colors, polka dots, grays and blacks, chevron - it matches them all! and the robots are lots of fun!:)
 
Speaking of chevron..... CTP has some FANTASTIC new borders out that are ChEvRoN!! I just had to have them when I saw them online. Many of the colors were back-ordered in August, so I had to wait on a couple of them, but I did get a few others. I am eyeing some more of them too! As I said above [and you can see in my pictures] I have a lot of chevron going on. So I had to have the borders.. I am also using their chevron nameplates on my students' desks. I took a tip from Pinterest and use Velcro to attach them to the desks - no more tape mess! I also took ANOTHER idea from Pinterest and laminated them now. Now my students practice writing their first and last name in neat cursive everyday with a dry erase marker. We just started this after returning from Christmas break and it is working well.  Here's a look at them and a link to see them all:
 

These are the Chevron Name Plates we are currently using:
 
Since our desks open upward, we keep the markers hooked on upside down and they won't fall off whenever we open our desks :) 
 
At the beginning of the year I was using these name plates I picked up at Lakeshore:

I ran out of the turquoise and orange which I had used to start the year, so I bought the newer chevron ones since they were all I could find. Now, on CTP's website I discovered they have other chevron name plates in solid colors that I'm liking better for next year!
 
 
This is their Turquoise Chevron Border around my dry erase board.. it looks more aqua blue on the website, but it is a true turquoise in person!


 Valentine's door using Chocolate Chevron Border:
 
 
Christmas door - wishing I had the Poppy Red Chevron Border instead! hopefully next year :) 


What I like most about the borders [beside the fact that they are chevron ;)] is the width. They are 3" wide, compared to border that is curvy. It gives a clean, bright edge.... especially on those pesky bulletin boards! Do you have any of their chevron borders? What colors do you have, and what do you think of them!? I currently have what you see above, along with the Slate Grey. My wish list includes the Poppy Red and Lime Green too!
 
 
Well, I think that's all for today.... whew, I'm tired! :)
 
Have a blessed week, and stay warm!
Tami :)


Friday, August 23, 2013

Remember Me? [part two]

I'm back again, and quickly this time! :) I promised I would post more often, and by the title of my last post, I HAD to post at least a part two [if not a part three here shortly].
I was back at work in my classroom again yesterday. I got a lot of detail things I had thought about doing done! Most teachers probably don't decorate their rooms to the extreme with which I do, but it's just my personality and I can't help it. I definitely type-A and extremely detailed oriented [and also a tad geeky!] the little accents and things here and there are what really get me pumped! lol

So here's a look at my classroom yesterday standing from my doorway:


What do you think? In my last post it looked pretty much the same. I just got the students' nameplates and Take Home Binders [look for a post about those coming soon!] done and added something to the front of my desk. I also changed up my Reading Corner off to the left there.

I had put my new robot calendar [that I just LOVE] on the wall above the papasan chair near the reading corner. But I just didn't like it there. Last year my calendar was on the middle window [now behind my desk] and loved it being on the window. So I changed up the Reading Corner and took the Book Bin shelves away from the window and put the calendar on it. I then put the book bin shelves against the wall where the calendar was and it looks much better! I just want a rug to put over there now! [in time...because of course the one I want and I won't settle for less is a bit pricey, so I'm waiting for my next TpT payment in September! lol]

So here's how it looks now:


I like it so much better.....don't you!?

Here's my Book Bin shelves I was able to finish yesterday too! I got my class list Wednesday [yayy!] so I was able to make the tags and get them finished up. Here's the complete look:

                                                          
and here's how I set them up:


Everyone has their own bin. They will keep their Read to Self books, Reading Group books, bookmarks and a small pack of Kleenex in there. [This idea dawned on me last year when I had a few girls ALWAYS needing to blow their noses while they were reading. This will prevent that. You know those 3 pack of purse-size tissues are only 99 cents - and saves their "hassle" ;)]
I numbered the shelves so they keep their bin with their number. They'll always be in the same place and I won't have to re-number them year after year.
The clips are new for this year; something I am trying. Last year I had a problem with them taking TOO MANY BOOKS! No matter how many times we talked about taking only 6 or 7, they would take at least 3 times that. Well not this year. I am going to number the clips to make their numbers and they are only allowed to take as many books as they have clips. They can take a clip back when they return a book. Right now everyone has 4 clips, but that's because I didn't buy that many when I picked them up at a flea market. I didn't exactly have a plan for them at that time, so two packs seemed sufficient....wrong! So I'm planning to stop out today and pick up a few more.... I think I will give everyone 6, perhaps 8 but I'm not sure. How many do you allow your students to take? Any input would be great!

Yesterday I also put up my behavior management clip chart. I made a new one this year to match the chevron [of course!] and hung it in a new spot. It looks great, I think!


I made matching behavior calendar logs as well. They are available in my TpT store here if you decide you really like it! I posted it on there because whenever I looked for a system I liked, the behavior logs didn't exactly match the clip chart because they were always separate files by different Teacher Authors. Chevron is a huge new craze and the colors match just about any "theme" so I thought it would be about time that someone offered BOTH together to correlate easily. Let me know if you decide to get them and how they work out for you! :)
You'll notice next to it the Homework Club display. It's a round cookie sheet from the Dollar Tree that I hung. I got the Homework Club sign, numbers and idea use from the TpT store of 4th Grade Frolics here for FREE! I love it and hope it will be a great incentive for my students to do their homework! We shall see..... ;)

Well, that's all for this post... I have lots more to show and say but my Hubby wants me to bring him lunch at work :) so I'm off to pick us up some Panera [yum-o!]
I'll definitely be back with a part three [and who knows, maybe even a part four] some time soon [maybe even later tonight]....

Until then, thanks for reading and have a BLESSED day!

Tami :)