Showing posts with label Christian classroom. Show all posts

Monday, September 19, 2016

Classroom Management Part Five: Class Contributors


In my opinion, it is so important for students to learn responsibility at as early an age as possible. 

In my classroom, I make sure I help students understand what it means to be responsible and to make a commitment. To implement this, I decided to take my classroom jobs and make them more meaningful. I wanted my students to take ownership of their job and to do their very best. How did I do that? I'm glad you asked!

I took my job system and added in higher expectations. I also decided that in order to do a better job in the classroom with their responsibilities, they needed to hold the jobs for longer than a week. So, I switched to monthly job rotations. This allowed them to learn the job and develop it over the course of a month, rather than just a week. It also gave us more time in the classroom every Monday morning. Rather then randomly selecting the jobs with them each week, students were introduced and explained each job once at the beginning of the school year. Then, they applied for jobs. This was done as an early finisher activity and took little instruction time out of the day. I then took the applications home or used my planning period to assign the jobs. On the first day of the month (or first day we were in school at the beginning of the month) I would change the numbers before the students arrived. They knew that jobs would be changing, so they would find their new job and start it right away. It has saved a lot of time!

During the application process, students could use the following description cards to remind themselves the expectations of our jobs to help them apply for the best job for them. Here's a look at a few of those cards. I had them printed and laminated, and kept them on a binder ring. Students could go up and look at any time while they were applying. They also worked well for me to use to remind students of their job if they were failing to do it properly.


I kept the rings with the applications so I had everything in one convenient place. This is on the side of a tall shelf that is right next to my job posters wall. 


I noticed the year previous to implementing this new system, that students were often forgetting to do their jobs and I would have to remind them. The point of the jobs was to learn responsibility, but they also helped ME.. if I was having to remind them of their job, how was that actually helping? It wasn't! So, I decided that I needed a way to provide them of that reminder. So, I decided on using student lanyards. They would serve as a visual and tactile reminder. They could see on the bright card the job they had, and could also feel the lanyard around their neck and be reminded in that regard as well.

I also added the orange card you see. I knew I would be having 12 boys in my class and wanted them to come to school and "put on" an attitude of being ready to learn. When they put on the lanyard, they were ready to work and do their best. When they took it off for lunch and recess, they were free to have fun and relax a bit. When they returned to the classroom and put them back on, they were ready to work again.


We store them on a command hook next to the door so students can grab them as soon as they come in to the classroom and hang them up on the way out.


I added the small numbers so that we knew who the lanyard belonged to and to help students learn their numbers at the beginning of the year. 

I purchased the lanyards from Oriental Trading Company [only $6.99 a dozen] and the plastic card holders from Staples.

Then, at the beginning of the month when jobs changed, my paper passers would collect the job cards and we would redistribute them as we got settled in to the morning. It took little time and my students did it. It also helped them learn their friends jobs and they would help remind each other to complete them rather than me having to do so! They became quite helpful.

If you like this system, you can check it out on TpT here! you'll get everything you see above, with editable versions of the description cards and lanyard cards, with 25 different jobs included!

Or, if you want to just implement the application process to the job system you are already using, you can check that out here! 


Friday, November 13, 2015

Bulletin Board Ideas for the Christian Classroom


If you teach in a Christian school, or even teach Sunday school or lead in some way work in children's ministry, I have a sneaky way to immerse your students and help them learn God's Word.... BULLETIN BOARDS!

In my school, probably like every other school across the country (and around the world!) our hallways are lined with bulletin boards, and our students will take advantage of any opportunity to look at a bulletin board if they are walking down the hall. Frequently, I see students pausing to read something on the bulletin boards as they walk to/from the restroom, more than likely in an attempt to spend as much time wandering as they can! So, if we have the opportunity to use it to minister to them and embed God's Word into their hearts... why not!?

It started with my lack of ideas for craftivities to display, and morphed into this idea over the course of my last few boards. I like trying to inspire my students, and let's face it - MYSELF - with God's Word in every way I can. We spend most our time living in the world and not The Word, so I strive to put The Word into the world as much as I can.

Here are some of my ideas... I hope they will inspire you with ideas and verses to use in your classroom, school, church, whatever!


We'll start with my most recent board and work backward. It's a hymn I hear in church a lot, particularly when we give the offering, and it was stuck in my head each time I tried to come up with an idea for the board about thankfulness. I simply printed the letters one per page from the computer with the font KG Summer Storm Smooth and cut them out. The background is wrapping paper I found on Amazon. I plan to leave it up all year. I love geometric print and orange is my favorite color! The goal is to put it up the one time, and make it work for all four seasons! I did the same thing last year..which you can read about here in this post! I have to say, this board is probably one of my all-time favorites. I just love the clean look of it, and that tissue paper is so great. Cheap, yet the look of burlap. I also love the arrows >>>  on trend. (not that I'm tooting my own horn, or anything!)


This was my board I used for Back to School this year. I love how the teal can read "all ways acknowledge Him" inside of the whole verse itself. My classroom colors are turquoise/teal & orange, so I made the board to match. I cut out letters on a Cricut machine with two different cartridges. It was a lot of letters (I laminated them all too!) but so worth it. I loved reading this verse over and over every time I left my classroom. I hope my students did too!
The borders are from Creative Teaching Press. When it came time to change it, I just took down the teal, left the white (which has flat edge showing, the wavy edge is hidden behind the teal) and used tissue paper to make the border on the new board up above. I just cut each piece of tissue paper in half and scrunched & stapled it along the edge. Just 2 packs made the whole board!


These doors are from the fall of the past two years. I just love them both, for different reasons. You can see I love chevron. Both are borders from Creative Teaching Press as well. I used wrapping paper for the board on the left from Target. The board on the right is a verse from the book of Psalms, with pumpkin cut outs from Creative Teaching Press.


These are doors I did at Christmas for the past two years. The one on the left is one of my favorite craft projects. My students pain the lights, then glitterize them with their names. I used a light bulb clip art from Krista Wallden at Creative Clips in black and white that I enlarged and copied onto cardstock. We used the verse from Matthew about letting our light shine before others.

The board on the left is from last Christmas. I love reading the books The Legend of the Candy Cane and The Candymaker's Gift each year, then comparing and contrasting the two stories. We connected it to a craftivity last year, glitterizing candy canes. (I LOVE GLITTER!) I also posted a little sign I made, summarizing the Legend of the Candy Cane. I love how the teal chevron wrapping paper looks against the red - such a great color contrast! Again, all borders are from Creative Teaching Press. They make fantastic borders that go with everything!

I am always on the look out for fun printed wrapping paper when I go to Target. They always have the cutest paper! I stock up on one or two, and try to come up with a board from the paper. I just bought some adorable black and red plaid paper for this Christmas, and can't wait to come up with a new board and update this post to show you!


 This board is a tad busy, even for me. I called it my "pattern mixing" board, which I love to do with my fashion. I used some animal print pink wrapping paper from Target, and (you guessed it!) Creative Teaching Press brown chevron border. I cut out a bunch of random hearts from scrapbook paper I had on hand, and wrote my students names on them. The heart in the middle was a sign I picked up at Target as well, adding in the verse John 3:16 for Valentine's Day. The teal letters are from Dollar Tree! They seriously have the best stuff for teachers.


 It's not one of my most favorite executions, but it's cute nonetheless.


This board to the right is one of my absolute favorites as well. I apologize for the poor picture quality! This was as I was beginning my blogging and Instragramming days, and I didn't focus too much on how to take high quality pictures.

Anyhow, it is one of my favorite songs from Britt Nicole, You're Worth More Than Gold. Here's a link to her on YouTube in case you've never heard of her or this song. I love it!

Anyhow, I cut the letters out on the Cricut here at school to look like a rainbow and cut the word "gold" out of gold glitter scrapbook paper. I used clip art rainbows & clouds from Scrappin Doodles and overlaid a text box for my students' names. I also used the leftover gold glitter paper to make little gold coins, like the pot at the end of the rainbow. I made it in March around St. Patrick's Day. I did this one at least 3 years ago... maybe it's time for an update! If so, I'll post it for you to see this year's spin on it! :)


I'll also be sure to update this post in the future with more bulletin boards with Bible verses and Christian classroom inspiration for you, your students, and your school!


Do you have some to share? I'd love to see them and feature them here! Send them to mrstamilynnmo@aol.com so we can inspire students and teachers in Christian classrooms (and churches) around the world!


I have a slight clothing and school supply addiction, so this post contains Amazon affiliate links to help keep my bank account in the black! 

Thursday, September 10, 2015

Bucket Filling & The Bible


If you've never read my blog before today... WELCOME! My name is Tami and I teach 3rd grade at a Christian school in Ohio. I am passionate about educating our future generation, and especially doing so about our salvation in Jesus Christ.

When I head back to school, I make it point to start our year on a positive, God-honoring note. There's a BTS favorite picture book out there, you've probably heard of... Have You Filled a Bucket Today? by Carol McCloud. If you haven't, without ruining it, I'll just say that it sends such a positive message to students about how to treat others. But, in teaching at a Christian school and in-looking at the world from a Biblical perspective, I wanted to utilize this book to do just that. I started to think through the Bible and the more I read in the New Testament, the more I began to realize that Jesus IS the ULTIMATE BUCKET FILLER!

So, on the first day of school, I read this book to my students. We talk about ways to be a Bucket Filler, how we can treat others, and how it feels when we treat others kindly; showing them love. Then, I read them this verse, Matthew 7:12 [NIV]

"So in everything, do to others what you would have them do to you.."


You may have heard of this verse also as "The Golden Rule".... "treat others how you want to be treated." It is exactly what Jesus intends for us, to LOVE others the way we want to be loved. The way HE LOVES US. He is the ULTIMATE Bucket Filler, perfect and without sin. He showed everyone His Heavenly Father's love and did so especially by dying on the cross for our sins.

We spend time the first day studying this in my 3rd grade class to set a positive, Jesus-centered tone in our classroom.
I also have a plastic bucket I got one summer and have it hanging by the door to my room. I show my students that it is hanging there and it serves as our reminder to be a Bucket Filler to someone every day, just like Jesus. My students absolutely love this book and completely understand how to treat others kindly, and how not treating them kindly [or being a Bucket Dipper] is not a choice Jesus made. We strive to be like Him at our school, and this book takes that idea straight from the words and actions of Jesus Himself and makes them relevant for the brain and heart of an eight year old child.

If you teach in a Christian school, I hope this gives you a practical idea to implement in your classrooms to set a positive tone in your classroom. It would even be a great study for your whole school during Chapel!

I pray you are having a blessed beginning of the school year!

Monday, June 15, 2015

One Bulletin Board... all year long!

There is one common thing a lot of teachers seem to dread about their classroom.... BULLETIN BOARDS.

Now, I may be crazy... okay, okay, I AM CRAZY. But I don't mind bulletin boards one bit. I LOVE decorating them, finding fun colors and items to use, and thinking of a creative play on words for the title.

I think the one thing teachers get hung up on is hanging the paper and border every time. (you see what I did there!? #punnerd)  and for me, I only dislike it because I have a GIGANTIC bulletin board and an affinity for patterned wrapping paper. So recovering it every time takes about 2 rolls of paper and seems wasteful.


So this year, I decided to try putting up my paper and border ONCE and leaving it up all year, no matter what I changed it to for the season. I did this last year too, and it seemed to work well, so I thought I would document it for you and see what you think about it. It miiiight just make the task a tad less daunting for you... hopefully!


Here's some tips for how I did it...


Choosing a neutral background is the most important.. which is why I listed it first. Something neutral is going to be able to go with a variety of themes, colors, and seasons. I chose this navy blue striped wrapping paper from Target. It's simple with clean lines and has the potential to match a lot of things.

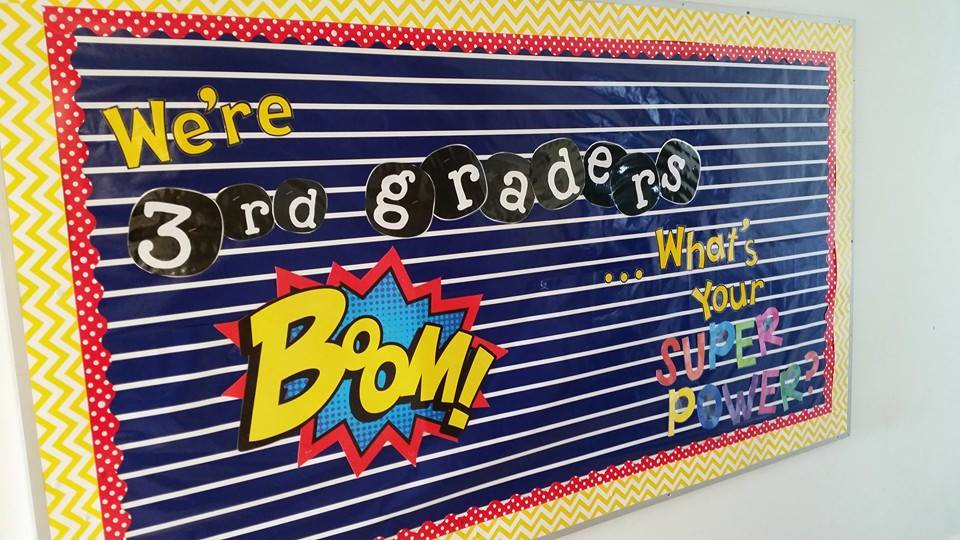
The year started with a super hero theme, so I matched it accordingly with my borders and other decor::
This went up in August and stayed until November-ish.


I use white thumb tacks to put up my borders. This makes it easier for me to change them down the road if I want to, because removing staples is a pain. It is also super easy to hide them in the border and then they aren't really even seen then! Like the polka dot border above... I just put a tack right on top of a dot and boom.. camouflaged.

Bonus: less holes in your border when you take it down compared to staples.
Double Bonus: you don't need to use a staple remover, so you're less likely to rip it!


..and then change ONE of them. I changed the bulletin board a tad late into the year... and when it started to snow I used this idea I found on Pinterest. I left up the red polka dot border that I had used before and just changed the yellow chevron to gray chevron.... same background but a much softer look for winter with the gray. I changed one piece at at time and it was so simple, compared to taking it allll down and putting something new up.

This stayed up November-ish until March. Winter is long in Ohio!
Click the picture to download the writing prompt paper for FREE!

To make the snowglobe, I traced the clear plastic plates I bought at a party store and drew on the bottom part for the globe freehand. I traced them on cardstock and the students cut them out.

I took their pictures all bundled up in their winter gear in the hallway. By taking them horizontally so that my students' entire bodies were in the picture and printing them as a 4x6" photo, they were able to JUST fit perfectly inside the plate!

I let my students decorate the inside to MATCH their story (so we did the writing process and activity first) and then we made the snow globe.

I mixed white glue and shaving cream for puffy paint for the snow and we broke out the glitter to decorate the bottoms of the snow globes (if they wanted... which they all did, of course!)

After they were completely dry (this took a few days) I hot glued the edge of the plate the cardstock snow globe. It's important to leave a small edge beyond what you trace so that there is room for the plate and paper to attach well. Beware: this uses a LOT of hot glue!

To hang them, I attached a small loop of yarn to the back of the globe with hot glue as well, but that is completely optional, depending on how you want to display them!  This has been one of my most favorite craftivities to date! I highly recommend it!


It's not always easy... so think about it. I had to kind of plan before I could make this bulletin board. I needed something to keep the blue. It reminded me of the sky so that idea led to finding something with clouds, and a Pinterest search led me to the balloon idea, which inspired the title. A little planning goes a long way, if you take a bit of time to do it. So don't rush the bulletin board change. It's okay if you don't change it immediately. Your board is still cute if you wait a week!

Here, you can see I just changed the inside border but left the gray. I went from red polka dots to hot pink on the inside. A few white thumb tacks stand out, but still look cute.
This bulletin board stayed up from late March and into May.


 Don't try to overdue it. I let the borders and background colors speak for the design the most and add just a few touches. A few fun fonts for the title and that's all I needed. The bright yellow pops against the blue and the cloud from the last board stayed up.. then I just added in my students' writing craftivity and that was that. I put this up in May and it stayed up until the end of the year.


and that was that. I made it last all year. I bought those two rolls of wrapping paper for about $6 at Target and made it last all year. I strategically covered any tears or worn out spots with the other items I put up and it didn't look bad through all 9 months... and I didn't have the headache of putting up new paper every time I did a new one.


What do you think? Would this solve your frustration with bulletin boards? Would you try it!?
Let me know in the comments below!


Wednesday, December 3, 2014

SnOw Excited!


Hey there friends!
I am SNOW excited for SNOW many reasons!

First of all, we had our FIRST SNOW DAY already this year! It actually happened a couple of weeks ago in the middle of November...WHAAAT!?? I know, right?! It was crazy. I hope it's not a foreshadowing of our NE Ohio winter ahead! I told my Grandpa about it, who lives in Florida now but grew up here. He said, if it stays at this rate, I could be teaching well into July! oi! I sure hope not!

I am also excited because I got the NEW Skippyjon Jones book titled Snow What!

It is just SO CUTE! I got it about a week ago and had to share it imediately the next day morning with my kiddos because I just couldn't wait to show it to them and put it out in the library! They just LOVE Skippy [as we affectionately call him :)] and look forward to every Friday afternoon when they get to find out who goes home with him for the weekend! It bought the Literacy Bag they sell on the official Skippyjon Jones website, plus a Skippyjon Jones stuffed animal from Kohl's Cares (who can beat $5!?)

I'm also excited to show you my new door decor and bulletin board for winter! I just LOVE them both!

Here's my door:
 

I used teal chevron wrapping paper I bought at Target as the background. I just love using wrapping paper! Do you?? I also used Poppy Red Chevron Border from Creative Teaching Press and broke up the pattern with a plain black border to make the edges really pop. I then used those amazing KG fonts from Kimberly Geswein to make the lettering. I printed the J in white with a black outline in Blank Space Solid and make the Jesus in KG Blank Space Sketch in red. I printed them onto cardstock, cut the out and laminated them. I covered the J in silver glitter to make it stand out. (I love glitter!) The is for is the font KG Always a Good Time. I also made the Legend of the Candy Cane poster with a poem I found online. I used some candy cane clip art from Krista over at Creative Clips to add some extra flair to match the poster I made. My colleague in 4th grade saw the garland at Dollar Tree so I added that on there. Finally, after reading the book The Legend of the Candy Cane to my students, we made our own candy canes and 'Js for Jesus.' They were super simple and yes, I broke out the glitter for them! I know a lot of teachers don't like glitter.. but I just love it! :)

Finally, here is our new bulletin board for winter. It isn't quite done because we have to still do the craftivity and writing, but it's at least up and looks good for now!

I really love this board because I was able to utilize the wrapping paper and red polka dots border I put up at the beginning of the school year. I only had to take down our original board and change the top layer of border to transform it for winter. I have a HUGE bulletin board that takes at least a roll and half of wrapping paper. Plus, I love that blue and white stripe pattern and Target is all out of it, so I wanted to make it last all year! I try to do that often over the course of the school year. I'll be blogging about that soon to share with and show you how I keep that background and borders up year round!
So here's how I made it... again, I used chevron border from Creative Teaching Press, this time in gray. (It had previously been yellow for our Superhero Kids theme). I then just added some foam snowflake cutouts I had randomly around the edges. I printed some snow globe clip art from Krista again at Creative Clips and used KG fonts for my title. The 'If I lived in a" if KG Blank Spaces Sketch again, and "snow globe" is KG Wake Me Up. Again, I printed on card stock and laminated them so I can reuse them! Next week we will work on this craftivity and writing piece since we had some other things to work on this week. I can't wait to show you what they write and come up with! I am still thinking through exactly what I want the craft to look like. Here's some examples I found on Pinterest...

Aren't they adorable?! I'm not sure which one, or combination of them I will come up with. But I'm excited :) I do know I will take their pictures to put in them. They are just too cute :) I pinned a bunch of ideas on my Pinterest board Teaching [crafts] if you want to check out all my pins and pin with me!


Well, that's all of my SNOW excitedness for the moment. What are you SNOW excited about??
Happy December, friends!


Wednesday, March 26, 2014

I {mustache} You a Question.....

.......do you love giveaways!??!

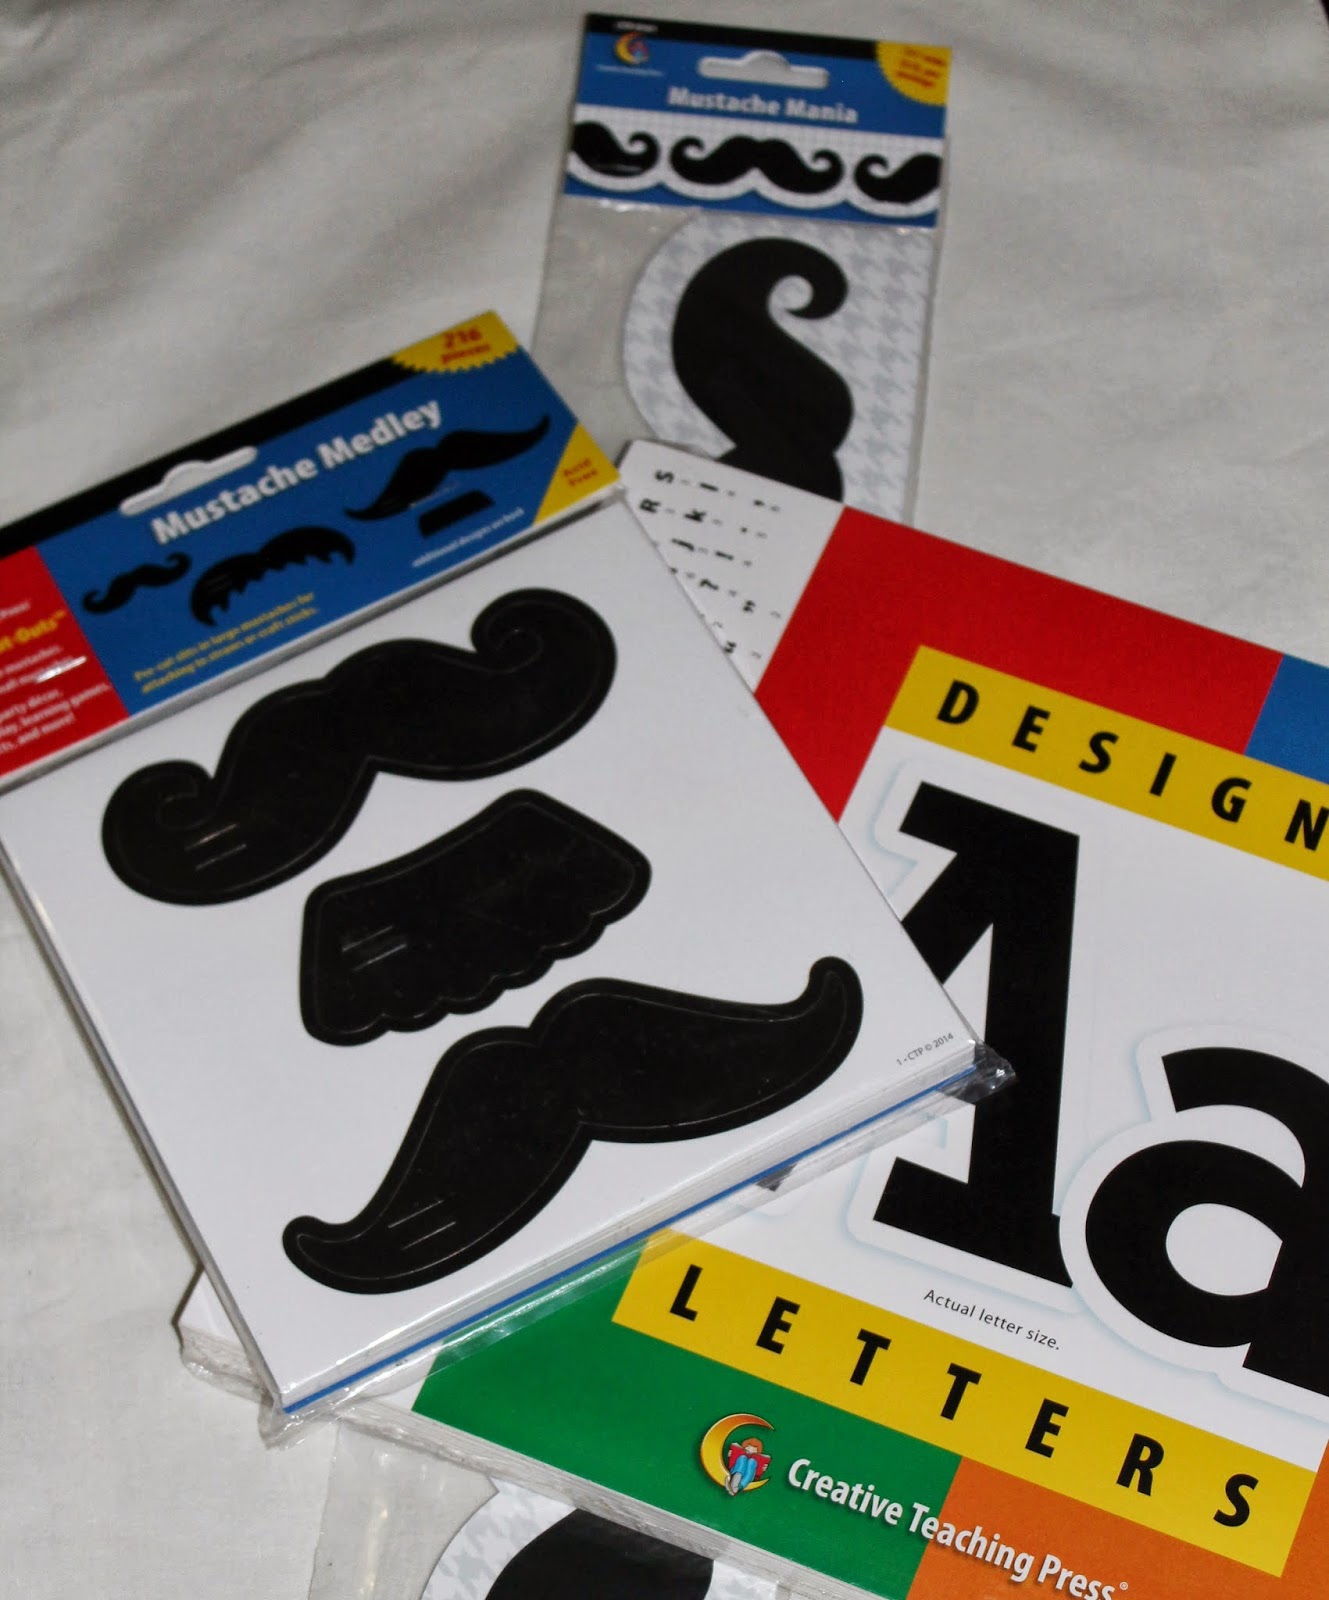
If so, you've found the right place!!! Thanks to Creative Teaching Press I am giving away some fan-STACHE-tic classroom goodies!

I recently made a new door for my classroom with the latest craze... MUSTACHES!


It's by far one of my most favorite doors/bulletin boards!

You can recreate it or make your own fan-stache-tic display by entering my giveaway below!
You can earn extra daily entries on my Instagram account too! :)
Here's what you'll win!


a Rafflecopter giveaway


Wednesday, January 29, 2014

Exciting News, Riveting Robots & MORE Chevron!

Hey there!

I am excited to announce that I will be pairing up with Creative Teaching Press to receive and review their products here on my blog! What's more exciting is.... I will be able to do GIVEAWAYS so you can have a chance at trying out their products too! YAY!

So, to kick it off, I am going to show you how I have been using some of their newer [and cuter] lines in my classroom this year!

The first is their Riveting Robots! Each year I have had a theme in my classroom. The first year I used stars everywhere and had a star calendar and star job chart. Last year I used owls. I love owls and have an overall general chevron theme going, but I wanted a new calendar, job chart, and additional theme since I have had the same students the past couple of years. I was shopping at Lakeshore one day [teacher heaven!] and saw these cute gears and robots borders. I did some digging on the CTP website and was hooked! I decided that the owls had been more of a girly theme [as most are, being that they are décor items] so I figured the boys would appreciate this theme a bit more :)

Here's a look at how I used them:

I decided to make my hallway bulletin more permanent this year to display student work, and change the covering on my door periodically instead [see below for my doors so far this year!] On the right is the permanent work display with their Dots on Turquoise Border, and on the left I used the Nuts & Bolts poster from the Riveting Robots Bulletin Board Set.  I love mixing patterns, so the Target wrapping papers and polka dot borders were fun to mix and match!

 
Here's how I use the poster more specifically: since it says "The Nuts & Bolts of" and leaves it open-ended for a variety of uses, I decided to use it to display our "objectives" or broad learning concepts in each subject. Bible is changed weekly to include our unit focus and memory verse, but the others change less frequently. I laminated it and use a dry erase marker so I can change, add, and or remove things as often as I need. I like displaying it in the hallways for parents and visitors to see what we're working on! I also used the gear to show what we will be working on in the near future!


To make attendance a bit more visual [and to cover my not so attractive desk!] I used the Riveting Robots Designer Cut-outs with some chevron contact paper I found on Amazon. I wrote my students' names and laminated them for durability all year, and added magnets to the back. My little "robots" report each day to show if they are absent or present. It's just a fun, silly way I brought in the robots some more :)


I [of course] had to buy a new calendar set & job chart to match my other new robot themed items! Since I have a lack of wall space and A LOT of windows, I decided to make my window my calendar space. Since we are in 3rd grade now, I don't feel the need to have a calendar time/morning meeting everyday. Instead, the calendar is one of my classroom jobs. We use window markers from Pat Catan's in bright colors to write the regular date and digital date below the calendar itself :)  The days of the week and weather report are below the window on the wall.


Of course the job chart needed a fun title to it [in 1st grade they were "Star Helpers" and last year they were "Owl-fully Helpful!"] This year, they are my "Handy Helpers!" :)
 
Lastly, I used the corresponding gears border [my favorite of the whole line!] and robot cut-outs to make my door covering to kick off the new year.... we were "Gearing Up for Third Grade!"
 
 
My only regret was not ordering the matching letters they have for this line. When I was shopping at Lakeshore they had some items for the line, but not all of them. So I had to go online to buy the other pieces I needed/wanted. I had already bought the above set of letters, so I made them work. But I am thinking I am going to have to get the matching nuts and bolts style lettering for future use.
 
What do you think of the Riveting Robots line?!? Leave some comments below and let me know! I personally love, as did the boys in my class!! What is great about it, too, is there are many colors and patterns mixed into everything so it can easily go along with many of the items you already have. If you have primary colors, polka dots, grays and blacks, chevron - it matches them all! and the robots are lots of fun!:)
 
Speaking of chevron..... CTP has some FANTASTIC new borders out that are ChEvRoN!! I just had to have them when I saw them online. Many of the colors were back-ordered in August, so I had to wait on a couple of them, but I did get a few others. I am eyeing some more of them too! As I said above [and you can see in my pictures] I have a lot of chevron going on. So I had to have the borders.. I am also using their chevron nameplates on my students' desks. I took a tip from Pinterest and use Velcro to attach them to the desks - no more tape mess! I also took ANOTHER idea from Pinterest and laminated them now. Now my students practice writing their first and last name in neat cursive everyday with a dry erase marker. We just started this after returning from Christmas break and it is working well.  Here's a look at them and a link to see them all:
 

These are the Chevron Name Plates we are currently using:
 
Since our desks open upward, we keep the markers hooked on upside down and they won't fall off whenever we open our desks :) 
 
At the beginning of the year I was using these name plates I picked up at Lakeshore:

I ran out of the turquoise and orange which I had used to start the year, so I bought the newer chevron ones since they were all I could find. Now, on CTP's website I discovered they have other chevron name plates in solid colors that I'm liking better for next year!
 
 
This is their Turquoise Chevron Border around my dry erase board.. it looks more aqua blue on the website, but it is a true turquoise in person!


 Valentine's door using Chocolate Chevron Border:
 
 
Christmas door - wishing I had the Poppy Red Chevron Border instead! hopefully next year :) 


What I like most about the borders [beside the fact that they are chevron ;)] is the width. They are 3" wide, compared to border that is curvy. It gives a clean, bright edge.... especially on those pesky bulletin boards! Do you have any of their chevron borders? What colors do you have, and what do you think of them!? I currently have what you see above, along with the Slate Grey. My wish list includes the Poppy Red and Lime Green too!
 
 
Well, I think that's all for today.... whew, I'm tired! :)
 
Have a blessed week, and stay warm!
Tami :)