Wednesday, December 2, 2015

Classroom Management Part Three: The Fairness Cup


Over the past few posts, I've been sharing my classroom management tools and tips with you. Nothing remarkable or earth-shattering. but ideas straight from the classroom, teacher-approved for immediate implementation.

The same is no different for today's post. You may have seen something like it before. Maybe not. It's something I use constantly in my classroom. I couldn't teach without it. In fact, I have multiple of them all around my classroom.

It's my Fairness Cup. A magical little tool that takes the argument and decisiveness out of choosing students for tasks (certain tasks, let's be honest) and makes it "fair." Everyone has the same opportunity to be chosen for every single activity, every single time. There's no more arguing, no more "Why am I always last!" or other outbursts. In fact, now my students actually promote the use of it! They know everyone has equal opportunity to be chosen, and if they aren't, they're okay with it because they know it was completely fair. It's a magnificent thing! It also takes the guesswork out of who I have called on and who I haven't throughout the course of the day. It does the thinking for me - and that is just fabulous!

It's so simple, and you probably have everything you need laying around to make one (or two!) of your own.

Here's what one of mine looks like.


I used a mini bucket I had in my classroom and some clothespins. I wrote my students' names and numbers on them, and pull them out one at a time when I need to call on students. After I pull a clip, I clip it to the rim of the bucket so I don't have to put it back in and won't pull it out again. I can also then pull them off the rim and put them back in one at a time to choose after I have pulled all of the names out. It keeps them constantly mixed up and truly "fair" in selection!

I also have a pencil jar from Target with large wooden tongue depressors that have my students' names on each end. I have the two fairness cups located in different places in the room so there is always one nearby when I need!


So - that's it! 


Tuesday, December 1, 2015

Classroom Management Part Two: Managing Students with OCD


I said in my previous post that I do not claim to be a classroom management expert. I also do not claim to be anywhere near an expert on OCD, children with OCD, or anything in any realm of any of those things.

I am a teacher. I am teachable. I like to learn and become the best I can possibly be! So, this year, when I presented with a new student and new challenges to face, I knew I would need to learn and adapt even more. I was able to tell right away that this student had some compulsive, almost anxiety-related behaviors, and our intervention specialist who comes in my room a few mornings a week noticed them as well.

They typically didn't (and still don't) interfere with our learning throughout the day, but they were starting to become a bit overwhelming for me to deal with on top of other behaviors and typical day to day learning activities.

Post Your Daily Schedule

One of the biggest things that would happen constantly throughout the day would be questions about our schedule. "What time is snack?".... "How much longer until lunch?" .... "What are we doing after this?" were questions I heard multiple times a day, every day at the beginning of the school year. He would get out of his seat and come ask me these things whenever he wanted to know the answers as soon as he thought of them, no matter what were doing. It was becoming a lot to handle, as I said before, so I now make sure to post our classroom schedule every single day.

It's a lot easier said than done, as my schedule changes almost daily with individual tutoring pull-outs, a teacher who joins us three afternoons a week, and a special that disrupts two of our days. I have A LOT of these schedule cards (and even have to make a few new ones within the week!) and I have to change it every morning, but it has been SO worth it. The questions about what we are doing next and when a specific activity happens no longer occur. He can look at our posted schedule, look at the clock, and know when every thing will be happening. With a constantly changing schedule, it also helps keep ME on track, especially for all of the students being pulled out every day.

o-h so blessed

The schedule cards I use are from Amy Groesbeck on TpT. They are completely editable and she tells you in the pack what fonts she used for each part. I printed them at 50% onto cardstock so they were small enough to fit into this pocket chart. She has them sized for a half-sheet of paper. I just made the schedule headers to mimic them and created the clocks using clip art from Ashley Hughes. I cut and laminated them all and keep them in a little paper pocket on the wall next to it so they don't get lost!

o-h so blessed
The orange pocket chart is from the Target Dollar Spot. I was so excited when I saw it, I bought the last 4 they had. Orange is my favorite color (if you can't tell!) and is one of my main classroom colors. I HAD to have them!


o-h so blessed


Board Reminders

Another organizational tip that has helped manage his anxiety and compulsion is this student is posting labels all throughout the classroom, especially at the board. Here's what my whiteboard looks like...

o-h so blessed


o-h so blessed

Whenever my students need to take out items for specific activities or subjects, I made these cards for the board. I put a check mark next to them as I tell them what to get out, and it prevents the "What do I need!?" question that ALL students ask repeatedly! I write on or under the "workbook" and "notebook" cards for the specific subject they need, such as Science, Language, or Math. Those have been the MOST helpful, since some students take out one instead of the other (we use a lot of interactive notebooks!)

I also get asked "What can I do now?" A LOT. Still. It's frustrating. 

But I have these "All done? Pick one?" choice cards posted in the front of the room. My students can choose from any of these activities after they finish an activity or independent work before our next part of the day. Slowly they are learning that these are choices they can ALWAYS make WITHOUT ASKING, but we are getting there. My student with obsessive compulsive issues understands this very well. My students who struggle are my rule-following people-pleasers. They want to make sure they are always doing what they are supposed to, so they constantly ask to make sure they don't get in trouble. I completely understand that. I am the same way.


o-h so blessed


If you like the board signs I made above, you can download them HERE FOR FREE!


Stay Consistent

This is a difficult thing to do sometimes (well, maybe not for you, but for me it is!) When you tell your student who has an obsessive-compulsive personality, they will remember it. I promise. They won't forget. So be consistent in what you say. I have noticed that my student can have a difficult time adjusting to change, so I make sure that routines are consistent because they are important. My overall behavior management system stays the same all year. I pass out tickets for positive behavior choices. If I want to change it up or encourage better overall behavior as a class, I make them additional to our current system. They still earn tickets individually, but I also add in a whole class reward or small group rewards that they can earn. This excites and engages him, without the anxiety of change to overall routine.

If something will change, I make sure to tell him one-on-one so he knows. I don't make it a big deal. I just explain what is going to be different and why, and make sure to answer any questions he may have. Then. the change isn't sprung on him during the day and he is prepared for it in advance.

I also have to stay consistent in my prep. He expects there to be VIP students chosen every day (more about that coming soon). He'll come in the classroom when he unpacks in the morning and look to see if I chose VIPs already. If I haven't, he'll ask. "No VIPs today?" (He says it like "vip" as a word, rather then the three letters - it's adorable!) or "Will there be VIPs today?" So, I have to be consistent, or he'll remind me. Being consistent in MY daily routine helps keep me on task and helps prevent those questions and anxieties for him.

Remove Distractions

My student with these tendencies this year loves to read. I mean absolutely LOVES to read. So much so that it becomes an obsession. He would read all day long if I let him. (Great problem to have, right!?) Well, not really. With my Daily 5 set up, my students have personal book bins at their seats with them and I encourage them to always be full of high-interest books. For this little boy, that can be a problem because he won't stop reading. In the middle of a math lesson, he'll have a book out and be completely engrossed in it.

One day, genius struck, and I realized that I didn't need to take away the books. I never want to discourage a student from reading! But I did need to take away the distraction of the books. So, he still has a book bin, he just doesn't keep it next to him at all times. Instead, his bin is kept across the room on the chair of our writing center. When he finishes all of his work, he may then go get his book bin to read. It has helped him pay attention to lessons MUCH better now. He hasn't needed reminded of this either, and always remembers the rule (a plus to his obsessive tendencies). I do have to remind him to clean up when we are finished reading during Read to Self time, but I don't think that will change. But the difference of asking him to stop reading during our lessons has been tremendous in the past two months with this one small change!


I hope you found some helpful tips and tools for managing students with OCD and obsessive tendencies. As I mentioned before, I am no expert. But having a student in my classroom with some of these tendencies, I have discovered a few things to have helped me to manage the day-to-day routines of our classroom, and save a little bit of my sanity along the way! I hope they can be a help for you, too, now and/or in the future!


Saturday, November 21, 2015

Macaroni Grammar

For the past few weeks during our language/grammar studies, we have been learning and mastering rules for punctuation, especially commas. So, before we began to learn about the use of quotation marks in our writing, I wanted to give my students some extra practice that didn't consist of a workbook page. So, I took some sentences, expanded them as I typed, and broke out some macaroni noodles I had to make the lesson more fun and hands-on!


My students glued elbow noodles for apostrophes and commas, and ditalini noodles for periods. When I copied the papers I made, I enlarged them onto 11x17" paper so the words were larger and allowed for room for the noodles. 

I had my students come up to the table to take some of each noodle that they put on a plate and we used white glue to attach them. The little orange bins came from the Dollar Tree, in case you were wondering :)


I created a FREE version for you to do this with your students too! Since I work in a Christian school, there are two worksheet options included: one for Christian classrooms, and one not. The little signs are also included for you too! To download, just click the picture below!


Friday, November 13, 2015

Bulletin Board Ideas for the Christian Classroom


If you teach in a Christian school, or even teach Sunday school or lead in some way work in children's ministry, I have a sneaky way to immerse your students and help them learn God's Word.... BULLETIN BOARDS!

In my school, probably like every other school across the country (and around the world!) our hallways are lined with bulletin boards, and our students will take advantage of any opportunity to look at a bulletin board if they are walking down the hall. Frequently, I see students pausing to read something on the bulletin boards as they walk to/from the restroom, more than likely in an attempt to spend as much time wandering as they can! So, if we have the opportunity to use it to minister to them and embed God's Word into their hearts... why not!?

It started with my lack of ideas for craftivities to display, and morphed into this idea over the course of my last few boards. I like trying to inspire my students, and let's face it - MYSELF - with God's Word in every way I can. We spend most our time living in the world and not The Word, so I strive to put The Word into the world as much as I can.

Here are some of my ideas... I hope they will inspire you with ideas and verses to use in your classroom, school, church, whatever!


We'll start with my most recent board and work backward. It's a hymn I hear in church a lot, particularly when we give the offering, and it was stuck in my head each time I tried to come up with an idea for the board about thankfulness. I simply printed the letters one per page from the computer with the font KG Summer Storm Smooth and cut them out. The background is wrapping paper I found on Amazon. I plan to leave it up all year. I love geometric print and orange is my favorite color! The goal is to put it up the one time, and make it work for all four seasons! I did the same thing last year..which you can read about here in this post! I have to say, this board is probably one of my all-time favorites. I just love the clean look of it, and that tissue paper is so great. Cheap, yet the look of burlap. I also love the arrows >>>  on trend. (not that I'm tooting my own horn, or anything!)


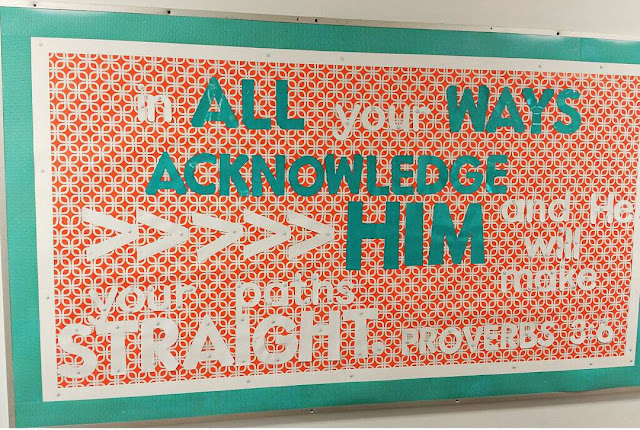
This was my board I used for Back to School this year. I love how the teal can read "all ways acknowledge Him" inside of the whole verse itself. My classroom colors are turquoise/teal & orange, so I made the board to match. I cut out letters on a Cricut machine with two different cartridges. It was a lot of letters (I laminated them all too!) but so worth it. I loved reading this verse over and over every time I left my classroom. I hope my students did too!
The borders are from Creative Teaching Press. When it came time to change it, I just took down the teal, left the white (which has flat edge showing, the wavy edge is hidden behind the teal) and used tissue paper to make the border on the new board up above. I just cut each piece of tissue paper in half and scrunched & stapled it along the edge. Just 2 packs made the whole board!


These doors are from the fall of the past two years. I just love them both, for different reasons. You can see I love chevron. Both are borders from Creative Teaching Press as well. I used wrapping paper for the board on the left from Target. The board on the right is a verse from the book of Psalms, with pumpkin cut outs from Creative Teaching Press.


These are doors I did at Christmas for the past two years. The one on the left is one of my favorite craft projects. My students pain the lights, then glitterize them with their names. I used a light bulb clip art from Krista Wallden at Creative Clips in black and white that I enlarged and copied onto cardstock. We used the verse from Matthew about letting our light shine before others.

The board on the left is from last Christmas. I love reading the books The Legend of the Candy Cane and The Candymaker's Gift each year, then comparing and contrasting the two stories. We connected it to a craftivity last year, glitterizing candy canes. (I LOVE GLITTER!) I also posted a little sign I made, summarizing the Legend of the Candy Cane. I love how the teal chevron wrapping paper looks against the red - such a great color contrast! Again, all borders are from Creative Teaching Press. They make fantastic borders that go with everything!

I am always on the look out for fun printed wrapping paper when I go to Target. They always have the cutest paper! I stock up on one or two, and try to come up with a board from the paper. I just bought some adorable black and red plaid paper for this Christmas, and can't wait to come up with a new board and update this post to show you!


 This board is a tad busy, even for me. I called it my "pattern mixing" board, which I love to do with my fashion. I used some animal print pink wrapping paper from Target, and (you guessed it!) Creative Teaching Press brown chevron border. I cut out a bunch of random hearts from scrapbook paper I had on hand, and wrote my students names on them. The heart in the middle was a sign I picked up at Target as well, adding in the verse John 3:16 for Valentine's Day. The teal letters are from Dollar Tree! They seriously have the best stuff for teachers.


 It's not one of my most favorite executions, but it's cute nonetheless.


This board to the right is one of my absolute favorites as well. I apologize for the poor picture quality! This was as I was beginning my blogging and Instragramming days, and I didn't focus too much on how to take high quality pictures.

Anyhow, it is one of my favorite songs from Britt Nicole, You're Worth More Than Gold. Here's a link to her on YouTube in case you've never heard of her or this song. I love it!

Anyhow, I cut the letters out on the Cricut here at school to look like a rainbow and cut the word "gold" out of gold glitter scrapbook paper. I used clip art rainbows & clouds from Scrappin Doodles and overlaid a text box for my students' names. I also used the leftover gold glitter paper to make little gold coins, like the pot at the end of the rainbow. I made it in March around St. Patrick's Day. I did this one at least 3 years ago... maybe it's time for an update! If so, I'll post it for you to see this year's spin on it! :)


I'll also be sure to update this post in the future with more bulletin boards with Bible verses and Christian classroom inspiration for you, your students, and your school!


Do you have some to share? I'd love to see them and feature them here! Send them to mrstamilynnmo@aol.com so we can inspire students and teachers in Christian classrooms (and churches) around the world!


I have a slight clothing and school supply addiction, so this post contains Amazon affiliate links to help keep my bank account in the black! 

Monday, November 9, 2015

When All Else Fails...


I have always known I wanted to be a teacher. But it was no easy path in getting to where I am today. I feel like I could easily sing the Rascal Flatts song "Bless the Broken Road" about my teaching career, rather than about my love life. I followed a very broken path, but a path that is my own and made me the teacher I am today. God had everything worked out perfectly, and as I look back and reflect, I am thankful for all I overcame.

But I almost got in the way. I almost ruined it all. And I want to share my journey with you because it made me who I am today. I hope it will inspire you, motivate you, or touch you in some way. I know we all go through difficult seasons of our lives and careers, and as I go through a difficult school year as I write this, reflecting on the path I've taken to where I am now, the growth I have made as an educator and a person, helps me continue that growth and to be encouraged through this season. I hope it will encourage you as well, especially if you need it.

You see, I've know most of my life I wanted to be a teacher. I spent my days, like many of you probably did, playing school at home. I would use my allowance money at the teacher store for reward certificates and star stickers. I would teach my little sister and "grade" her papers. I was the "Teacher's Pet." I loved school, school supplies, and had so much school spirit in high school, it was  a tad sickening.

But, in high school, I started to fight it a bit. I thought about becoming a reporter or radio DJ because I loved sports and country music. I wanted to either be a sports anchor on ESPN or something (I loved baseball) or host my own show on the radio in Nashville (I was wildly obsessed with Kenny Chesney). I applied and attended a year away at college for Communications. But God had different plans. I had two roommates who I didn't get along with, one was particularly awful, and spent most of my freshman year of college either alone, studying, or driving home to see my boyfriend (now Hubby!)

I realized I should be home, and one late night while my roommate was so rudely keeping me awake before finals, I got fed up and applied for our local college. I also immediately changed my major to Early Childhood Education. I don't know what exactly prompted that.. all I can say is that God took hold of the moment.


I also realize now that I have always been made to teach. It comes so easily and naturally to me, that I literally can NOT do anything else.

Fast forward a few years, and I was finishing college. I had an amazing TEC field experience with a teacher I could envision myself becoming later on in my career. I learned a lot and entered my student teaching, my final semester, with so much enthusiasm and confidence. I was ready to take on the world, take her classroom by storm, and change lives.... but, I didn't. It was awful. I went from flying high to crashing and burning. It was absolutely the darkest 4 months of my life... and it shouldn't have been.

It was the fall. Christmas was approaching, I was engaged, and getting ready to graduate college. I was wedding planning, the date set for 6 days after graduation. And I hated every bit of what I was doing on a daily basis.

I entered the school building and classroom with so much fear and anxiety every day, that looking back, I was a shell of myself. I was not at all who I was supposed to be. I was sad, broken, and felt so alone inside.

I cried every night. I even cried in the bathroom during school. I spent hours planning and planning lessons, completely alone and terrified that I was doing it wrong, because my teacher made me feel like I made every wrong decision. That I wasn't good enough.

I don't think she liked me as a person. I think our personalities were very different, and unfortunately, it was held against me. I could hear it the moment I first spoke to her on the phone, and could see it the first day I met her at school. She didn't like some of the things I did, and instead of talking me through curriculum (which I hadn't even seen in any of my teacher prep courses) she went straight to her principal. I still remember the principal asking me to come to her office, walking in and seeing that teacher sitting there. She had a smug smirk on her face. Like she was happy with what she was doing to me. I remember the fear in that moment, realizing I would more than likely fail, and wouldn't even be allowed to teach ever again, let alone graduate.

I had no more passion. I didn't want to teach anymore.

I vividly remember sitting in a seminar our instructors gave for us as we were approaching graduation. They passed out some papers about what we could do with a degree in Education beside classroom instruction. I phased out of the session and simply studied that paper intently because I fully believed I wasn't going to use my degree to teach. I was going to find something else to do with it. It was so sad. I was heart broken during what was supposed to be one of the best learning opportunities of my career, and one of the happiest times of my life.

With God's grace and strength, I somehow survived emotionally, and graduated. Dave and I got married six days later. We went on our honeymoon, celebrated Christmas, rang in 2009, and I was convinced I would never be a teacher. I was scarred. I was hurt. I was terrified to ever teach again because I was convinced I was the worst teacher to walk the face of the earth.

I was working at a jewelry store that final semester of school, and decided I would just work there. After graduating, I started working full time and they offered me a management position. I decided that I could try to do that. I could work my way up to being a store manager, make good money, start a new career, and all would be well. That degree was a back-up.

But it wasn't. I was fooling myself.

That April, a friend dragged me to a job fair. While all of my friends went to the local school districts to try to really find a job, I interviewed with schools in Colorado and Texas, and even talked to a school for nannies. I was so convinced I wouldn't teach again, that I sabotaged myself and didn't look into anything productive. I knew my husband wouldn't move across the country. I knew we would never leave our hometown, our parents just a few miles away from us. I was still that defeated.

That summer, a friend of mine started working at a preschool. I was happy for her to be fulfilling her dream. A position became available for another preschool teacher, and she mentioned it to me. I started to think about it, and the tug to teach started to come back. I was restless. I was just working retail. I didn't like it. It wasn't my passion. I wasn't fulfilling my purpose in life, and thankfully, I was realizing it.

Like I posted in the title... when all else fails, TEACH
Everything else had failed me. I just needed to trust and teach.

By August, I had put in my notice at the jewelry store and was signed up to substitute teach in my county. A teacher friend of mine, from my alma mater, requested me to be her substitute for her first grade class one day, and I got my foot in the door. The rest is God's amazing plan that I can't help but think about with tears as I write this.

In November, they offered me a new Title Coaching position for 3rd & 4th grade for the rest of that year, and even the next year. I spend close to 2 years making friends, regaining my confidence in myself as a teacher, and gaining such amazing experience and classroom insight. God was setting me up for where I am now.

I finished that job, and they didn't hire me. The only available position was filled internally, and I had nothing. I was devastated. Before my crushing student teaching semester, my dream was to get a job as my home elementary school, coach Varsity Cheerleading, and be a Maplewood Rocket the rest of my life. 

But, that didn't happen. 

I started taking classes that summer for my 4th and 5th grade endorsement. I had only one job prospect. ONE. At the school I am teaching at now. I interviewed.... and I got it. I prayed so hard for it, and God gave it to me. He fulfilled my dream, and looking back, it's because it was HIS dream for me. I finally followed the broken road that led me to His purpose for my life and career. Fast forward almost 5 years, and I discovered TpT, started this blog, using social media, and my passion is now a roaring fire!

It's not pretty, but it's my journey. I'm still scarred. I spilled a lot of tears as I wrote and read this post. It still hurts. I'm still not sure of myself as a teacher. Those 16 weeks of student teaching broke my heart and my spirit and I am STILL working to recover, over 7 years later. I'm still terrified I'll run into that teacher when I'm out and about shopping. 

I almost let one person and one awful field experience define me. Okay, I didn't almost let it, I did let it. But I am so glad God didn't let it. 

I think I overcompensate sometimes to prove to myself that I'm good enough. That I am NOT the horrible person and teacher I was made the feel my senior year of college. But, I also learned a lot about myself from that time. As I look back, I can see that it made me grow in a lot of ways. It wasn't easy, but it was a season that taught and prepared me for such better times. And I struggle now, in a new season of my career, I can look back with encouragement that I can do this. Because God has blessed my broken path, and has led me to exactly where He needs me to be.


I am a teacher... and I am O-H So Blessed.


Saturday, November 7, 2015

Classroom Management Strategies: Part One

classroom management


By no means do I consider myself a classroom management expert. But I do have over 7 years of classroom experience under my belt, and long list of creative ideas I've tried in my classroom during that time. Some have been extremely successful while others.. not so much. So over the next few weeks I'd like to take some time to share with you some  kid tested, teacher approved, real life strategies for classroom management straight from my classroom to yours!

This week, I'll start with a strategy that I use to help promoted positive behavior choices beginning the first week of school! [I hesitate to say the first day, because, well, we all know how insane the first day of school is.. and while we aspire to start on day one.. it definitely doesn't happen. I'll admit it for us all!).


classroom behavior system


My behavior system is certainly nothing fancy. I will fully admit that to start it off. Fancy isn't always practical, and I am definitely a practical teacher. So, if you're looking for something fancy, high-tech, or amazing brilliance... you won't find that here. It's just a simple, instant-reward ticket system. It works for me and my class, and if you're looking for something new to replace your clip chart, it might work for you too.

Like I mentioned above, I use tickets. Legit raffle tickets. They're low cost and super easy. Rip up a bunch and you're ready to go. Low-prep, low cost. I'm all about it! Here's a link to a bunch of cute, different colored ones I found on Amazon. For about $15 you'd be set forever. Literally. But I picked up my roll at a local party store, and I'm pretty sure I've even seen them at Wal-Mart before. So, they are easy to find and not expensive by any means. One roll should last you the rest of your teaching career!

I use them to reward my students positively. Let me say that again. I use it to reward my students positively. I pass them out to them over the course of the day for expected classroom behaviors.

and when I pass them out, I use positive words.


I like to teach my students to be polite. That includes raising their hands to speak rather than interrupting. Whether it is myself, another teacher, or another student talking, they need to learn to wait their turn patiently, and when they do I reward them and encourage them.


This one is huge. I have quite a chatty class this year, and they talk. Constantly. If one student starts to talk, it's like an epidemic and within seconds the whole class is talking. So, when I see a student working quietly (thankfully there's always at least one child who is!) I reward them with a ticket or two and say this. Usually, within a few seconds, another student takes notice (because they want a ticket too!) and like another epidemic, the talking begins to reverse and the class quiets down again. It's a wonderful thing!


This is another big one for my class this year. I a lot of boys. A LOT. 12 of them to be exact. And they are rowdy! They easily get off task and just love to talk. There's a lot of creativity in them (which I love!) and energy, spunk, exuberance for learning.. I adore them. But I also need them to stay focused when it's time to focus. So when I see one of them focusing when and how they need to be to learn, I reward that with these two phrases and some tickets. It helps and I am thankful for it! 


I also encourage my students when they are working hard. HOW that looks for every student is different. They work at different levels and paces, but as long as they are working hard on their assigned task, I am happy about it. So, of course, I encourage and reward it!

Now, that doesn't mean I don't use them negatively sometimes. But it's only SOMETIMES! If I have to repeat myself numerous times with directly and students still aren't obeying, or if I've rewarded ALL of the other students and that child is still off-task and not making the proper behavior choice, I will take a ticket. Usually, it starts with a warning because sometimes that's enough. However, there have been occasions where the taking of tickets is warranted. It happens. 

Here's how else I use them...
>>>For small group behavior rewards, with a Behavior BINGO chart. When ALL students in their pod are on-task, working hard and working quietly, I tell their captain to color in a square. When they fill a row, everyone in the group gets 10 tickets. When they fill up the board, they get a bonus 10 tickets. Let me tell you what, they encourage each other to be quiet and working! I love the teamwork!

>>>I have a Homework Club, from 4th Grade Frolics, and reward my students at the end of every month with about 15 to 20 tickets (depending on the length of the month and amount of assigned homework). 

>>>Mystery Student rewards! Sometimes, I need to run to the bathroom, or make a copy, or step of the classroom for a minute or two. It happens, it does. So, I'll pull a student name and tell them there is a Mystery Student watching for me while I am gone. They don't know who the Mystery Student is, only I do, and when I return to the classroom, I ask the Mystery Student if the class earned 2 tickets, lost 2 tickets, or nothing happens. 

>>>Field trips! I am NO NONSENSE when it comes to field trips. I have high behavior expectations when I take my class in public. So, I usually tell them that they have one choice: to earn x amount of tickets, or lose x amount of tickets. No in between, no individual-based rewards. They have to work together and they all must be well-behaved. I take no nonsense. Field trips are serious.

So, now what do I do with all of these tickets they are earning?? I'm glad you asked!

I have no-cost (and some low cost) rewards in my prize box, and at the end of every week my students are allowed to shop from the prize box with their tickets. 


These are my reward passes. I no longer buy little trinkets. They become SO costly! So, I use what's already in my classroom, what they ALREADY find to be special, and make it a pass! What's included in them all, here's the rundown:
>>Kindle time
>>computer time
>>no homework for a night
>>sit somewhere else for the day
>>bring in a stuffed animal for the day
>>show and tell
>>lunch with the teacher
>>write with a marker
>>choose your class job
>>free time for the class... and so many more!

Some of the low-cost ones on my end are higher-priced on their end. I have a Teacher Treat and Teacher Lunch pass where they request a treat to be brought in [Panera bagel, local coffee shop muffin or cookie -- they are HUGE! -- brownie, etc] and I bring it in for them. It's a BIG DEAL! Teacher Lunch is an even bigger deal.. they get to request lunch and I bring it in for them and they get to eat with me in the classroom!


I keep all of the reward prizes in this handy little supply box.


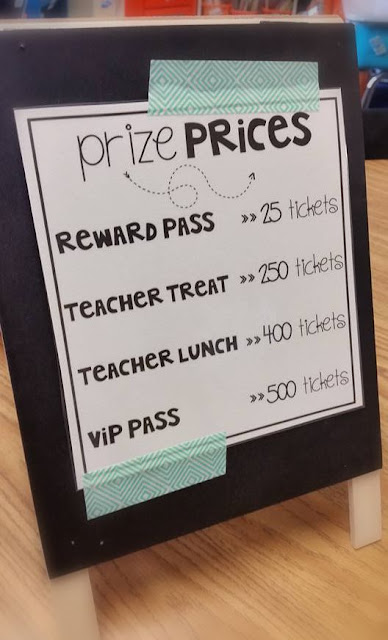
I made a little sign to show them how much things cost. I'll explain VIPs in a later post. VIPs are kind of a big deal.

 A former students gave me this owl as a gift one year for my birthday. I keep it on a shelf out of student reach, always filled with tickets. I also keep them in my pocket all day to pass out as the day goes on.


So, that's it! Strategy number one: a positive behavior management system. The key to is this: CONSISTENCY. My students know what I expect and what they should do. If my expectations and rewards remain consistent, I can continue to build (train) their positive choices. Then, over time, I slowly remove the ticket as the reward, but say the phrase the confirm and encourage their positive behavior choices! So far, after 46 days of school, I have been unable to do that with my current group, but we're working on it! :)


What are your thoughts? Do you implement a similar strategy? Share it with me below! I always enjoy finding new ways to approach classroom management!

I'll be back soon to talk about more classroom management ideas, including
>>>Managing Students with OCD
>>>Student Contributors: Class Jobs to Promote Responsibility
>>>The Fairness Cup

Follow me on Bloglovin' so you don't miss my next post!


Tuesday, October 6, 2015

Book It: Reading Tracking Made Simple!

Do you and your students participate in the Book It program? If so, I have a simple and easy way for you to track your students' reading minutes!

I created these bookmarks that serve as a dual purpose: bookmarks & reading minute trackers!
It's this simple: every night that your students read for 20 minutes, they [actually - their parents!] punch a hole in bookmark with a hole puncher. At the end of the month, when all the holes have been punched, they turn it in to your for the Pizza Hut pizza certificate! That's IT! {I also told my students that parents could X or color in the circles with a Sharpie if they didn't have a hole puncher on hand!}

To make them, I just printed them onto Astrobrights colored cardstock, laminated them [so they would be more durable all month], and cut them out. When I passed them out to my students, I wrote their name on the back with a Sharpie and they put them in the pouch in their Take Home Binders for reading at night. 

Simple and DONE! I might just do this every month, it's just too easy!


Click the picture above to DOWNLOAD THEM FOR FREE!
I also included a second option that says "October Reading" in case you don't participate in the Book It program but want to have your students keep track of their reading at night. There are 24 circles, for 24 total nights of reading.

Enjoy!


reading minutes tracker

Friday, September 11, 2015

Sticky Note Lesson Plans & Erin Condren

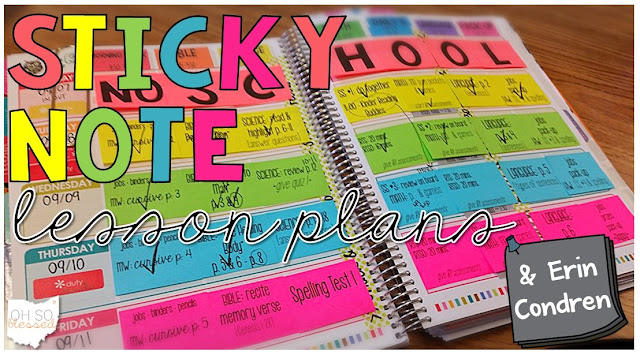
Lesson planning with post-it notes in the Erin Condren Teacher Planner

Hey friends!

I am so excited about this post because that picture above just makes my {teacher} heart SO HAPPY! I absolutely love lesson planning and looking at my lesson planner because, well.. just LOOK AT THAT! Those colors, those fonts, and that organization. It's too much! GAHH!

SOOOO... anyhow.. enough of my gushing... I guess I should start telling you WHY it's there!

If you've been on my Facebook page, Instagram, or Pinterest at all, it might look a tad familiar.

There's a post & YouTube video floating around that I've already done telling all about how I create my Erin Condren Teacher Planner with sticky notes.

However, I have been able to take this gorgeous masterpiece of a plan book... and improve upon it EVEN MORE! say whaaat!? I know! I didn't think this was at all possible either.. but it is!

So... if you first need to read the original post about how I did that... do that RIGHT HERE. RIGHT NOW.

Then come on back and read what's NEW AND IMPROVED!


So...let's play a game and see if you can SPOT THE DIFFERENCE:
Lesson planning with post-it notes in the Erin Condren Teacher Planner

Did you find it?

Here's what's new.... MY SUBJECT LABELS! noooww take a look!:
Lesson planning with post-it notes in the Erin Condren Teacher Planner

It may seem silly... but can I just say how WONDERFUL it is to not have to hand write almost anything in my planner these days!?!

Thanks to the genius of my friend Lisa over at Fourth and Ten and her beautiful Instagram post, I no longer have to write in my subject headers and times! Using Avery Return Address Labels [and all of the patience I can muster!] I created these subject and time labels for my planner! Now, I spend even LESS TIME setting up my planner week to week. I simply put in the labels, washi tape for our snack & lunch breaks, and I'm good to go.

Here's what a bunch of them printed out looks like:


I think I am even going to try doing my dates on them too so literally nothing is written in anymore. Another plus? If I mess up or decide to change something I can just cover it up with another and be none the wiser!

So, I know you might be asking "how do you make the labels in color?" Well, this is where that patience I mentioned [and don't have much of!] comes in. When you download and open the template [which you can get here for free from Avery] in Microsoft Word. I select the box in the template and go to "Format" >> "Shape Fill." Then, select the color you want the background to be. Of course, you can leave it white. But I went ahead and gave mine a rainbow pattern. Then, I overlay a text box [which I make translucent] and format my text. I copy and paste the text boxes to fill one column with the same label format. So, the first column is my red "Morning Work" label, the second is the orange "Bible" label, the third alternates "Science," "Health," & "History" in yellow since that's how I will be teaching it this year [rotating through each content over the course of the whole year] and then the last column on the page is the green "Math" label. Then, once I save the file, I close it and copy the entire file itself and paste it onto my desktop. I rename it (something I'll remember that corresponds) and change the text boxes to the times for each of those same subjects. That way the colors are already done and I just have to change the text and formatting.

I say it takes patience because Microsoft Word is finicky when it comes to layering and I spent a lot of time adjusting the text boxes so they would line up well. But, now that it's done it looks great and was well worth the frustration!

>>> If you click here, you can download one of my label files and give them a try to see what I mean. You'll need the font CartonSix so it looks right and go from there so some of the formatting is done for you! Remember..it's in WORD. I'm sorry!

PRINTING TIP >>> once you create those labels, you will need to save them as a PDF in order to print. The first time I went to print I didn't do that.. and they didn't bring with the color fill. So I have some pages of just plain white labels. Anybody want them!?

I bought the Avery Return Address Labels on Amazon... you can get a box of 2000 here and have them for at least 2 years, if not more.. it just depends how many you use a week. Right now, I use 19 a week, but if I print the dates like I think I will that will be 24 a week x at least 34 weeks of planning for 816 labels a year. 2000 divided by 816 is 2.45 years... not bad for about $7!

For your enjoyment, here's another look at the goodness of all the supplies I use when I am putting it all together...

Lesson planning with post-it notes in the Erin Condren Teacher Planner
You can see in the top right that I used labels to insert when I do our daily Read Aloud under other plans because I didn't have room elsewhere. It works great! I love that the post-it allows for TWICE the planning room. You can lift them up and jot notes, ideas, and changes underneath for future reference [and hide them with the post-it!]


Happy Planning!